
Are you an experienced crafter looking to take your scrapbooking skills to the next level? Look no further! In this captivating article, we will explore a variety of advanced scrapbooking techniques that will elevate your designs to new heights. From the mesmerizing art of heat embossing to the textured beauty of distressing and the exquisite layering techniques, you will discover creative possibilities that will leave you inspired and eager to create stunning, intricate scrapbook pages. Get ready to expand your artistic horizons and unlock a whole new world of scrapbooking possibilities!

Advanced Scrapbooking Techniques
Introduction to Advanced Scrapbooking
Welcome to the world of advanced scrapbooking techniques! If you’re an experienced crafter looking to take your scrapbooking skills to the next level, you’ve come to the right place. In this article, we will explore three advanced techniques: heat embossing, distressing, and layering. These techniques will add depth, texture, and visual interest to your scrapbook pages, allowing you to create truly unique and intricate designs.
Benefits of Using Advanced Techniques
Using advanced scrapbooking techniques comes with a plethora of benefits. First and foremost, these techniques allow you to elevate your creations from simple to stunning. By incorporating heat embossing, distressing, and layering into your projects, you can add a professional and polished touch that will impress both yourself and others.
Additionally, these techniques provide endless opportunities for creativity. They challenge you to think outside the box and experiment with different materials, colors, and textures. This experimentation can lead to the discovery of new techniques and artistic styles that you may have never considered before.
Lastly, advanced scrapbooking techniques offer a sense of satisfaction and accomplishment. As you master each technique and witness the transformation of your scrapbook pages, you’ll experience a sense of pride and fulfillment. These techniques allow you to create truly personalized and meaningful keepsakes that will be cherished for years to come.
Tools and Supplies for Advanced Scrapbooking
Before diving into the techniques themselves, it’s important to familiarize yourself with the necessary tools and supplies for advanced scrapbooking. These may include:
- Heat embossing tools: Heat gun, embossing powders, embossing ink, and a heat-resistant surface.
- Distressing tools: Sandpaper, distressing ink pads, distressing tools (such as edge distressers or distressing brushes), and a craft mat.
- Layering supplies: Patterned papers, cardstock, die-cut shapes, stickers, ribbon, adhesive foam dots or squares, and scissors or a paper trimmer.
Having these tools and supplies at your disposal will ensure a smooth and enjoyable scrapbooking experience as you explore the advanced techniques.
Tips for Getting Started with Advanced Techniques
Now that you have an understanding of the benefits of advanced techniques and the necessary tools, it’s time to dive into the individual techniques. But before we do that, here are a few tips to help you make the most of your journey into advanced scrapbooking:
-
Start with one technique at a time: Instead of overwhelming yourself by trying to learn all three techniques at once, focus on mastering one technique before moving on to the next. This will allow you to fully understand and appreciate each technique individually.
-
Practice on scrap paper: Before using your techniques on your actual scrapbook pages, practice on scrap paper to get a feel for how the techniques work and to experiment with different effects. This will help you gain confidence and refine your skills.
-
Take inspiration from others: Look for inspiration from fellow scrapbookers, both online and in-person. Explore scrapbooking forums, social media groups, and workshops to see how others have incorporated these advanced techniques into their projects. This will help spark your creativity and give you ideas for your own designs.
Now that we’ve covered the basics, let’s delve into each technique in detail, starting with heat embossing.
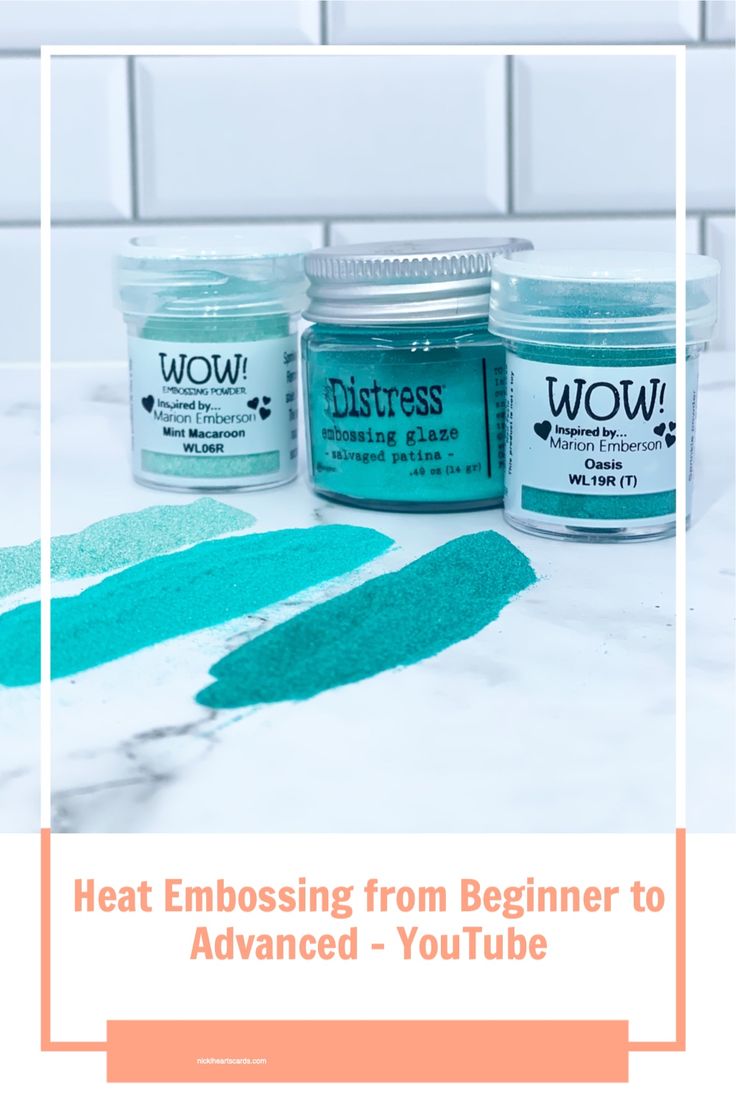
Heat Embossing
Explanation of Heat Embossing
Heat embossing is a technique that allows you to create raised and glossy designs on your scrapbook pages. It involves the use of heat, embossing powders, and embossing ink. By applying embossing ink to a stamped image or handwritten sentiment, sprinkling embossing powder over it, and then heating it with a heat gun, the powder melts and adheres to the ink, resulting in a beautiful and textured finish.
Materials Needed for Heat Embossing
To start heat embossing, you’ll need a few essential materials:
-
Heat gun: A heat gun is a handheld device that emits hot air. It is used to melt the embossing powder and create the embossed effect. Make sure to use a heat gun specifically designed for crafts to ensure safety and precision.
-
Embossing powders: Embossing powders come in a variety of colors and finishes, such as metallic, matte, or glitter. Choose the colors and finishes that best suit your scrapbook theme and desired effect.
-
Embossing ink: Embossing ink is a sticky, slow-drying ink that allows the embossing powder to adhere to the surface. You can find embossing ink pads or pens specifically made for heat embossing.
-
Heat-resistant surface: A heat-resistant surface, such as a craft mat or a heat-resistant silicone sheet, is essential to protect your workspace from heat damage.
Step-by-Step Guide to Heat Embossing
Now that you have your materials ready, let’s go through the process of heat embossing step by step:
-
Prepare your paper: Choose the paper or cardstock you want to emboss on. Smooth and heavyweight papers tend to work best for heat embossing.
-
Stamp or write your desired design: Use a stamp with embossing ink or write directly on the paper using an embossing ink pen.
-
Apply the embossing powder: Sprinkle the embossing powder generously over the stamped or written design, ensuring that the entire image is covered.
-
Remove excess powder: Gently tap off the excess embossing powder onto a scrap paper or a funnel tray. Use a soft brush to remove any remaining stray particles.
-
Heat the embossing powder: Hold the heat gun about 2-3 inches away from the paper and move it in a circular motion over the embossed image. The heat will melt the embossing powder, causing it to become glossy and raised. Be careful not to overheat or scorch the paper.
-
Let it cool: Allow the embossed design to cool for a few seconds before touching it. The embossing powder will harden and become permanent once cooled.
Techniques for Creating Different Effects with Heat Embossing
Heat embossing offers endless possibilities for creating different effects and designs on your scrapbook pages. Here are a few techniques you can experiment with:
-
Two-tone embossing: Use different colored embossing powders to create a two-tone effect within the same design. Simply apply one color to a portion of the design, then add a second color to another portion before heating.
-
Heat-resistant masking: Use heat-resistant masking materials, such as special embossing tape or heat-resistant paper, to mask off areas of the paper you want to protect from embossing. This technique allows you to emboss specific parts of your design while keeping other areas untouched.
-
Layered embossing: Create depth and dimension by layering multiple embossed elements on your scrapbook page. Emboss one element, let it cool, and then repeat the process with another element on top.
-
Embossing resist: Apply heat embossing to create a resist effect. This technique involves stamping or writing with embossing ink, applying clear embossing powder, and then covering the area with ink or paint. When the ink or paint dries, simply wipe away the excess to reveal the embossed design.
These techniques are just a starting point for exploring the possibilities of heat embossing. As you gain more experience, feel free to experiment with different colors, textures, and additional materials to create your own unique effects. Heat embossing is a versatile and exciting technique that can truly elevate your scrapbook pages.
Now that you’ve mastered heat embossing, let’s move on to another advanced technique: distressing.

Distressing
Understanding Distressing in Scrapbooking
Distressing is a technique that involves intentionally aging or weathering your paper and embellishments to achieve a vintage or shabby chic look. This technique adds character, texture, and a touch of nostalgia to your scrapbook pages. By distressing your materials, you can create the illusion of time-worn beauty and capture the essence of cherished memories.
Essential Tools and Supplies for Distressing
To begin distressing, gather the essential tools and supplies:
-
Sandpaper: Sandpaper is crucial for distressing paper and creating a rough and worn appearance. Choose different grits of sandpaper to achieve varying levels of distressing.
-
Distressing ink pads: Distressing ink pads are specially formulated inks that provide an aged, muted, or vintage look when applied to paper or embellishments. They come in various colors and can be used to distress the edges or entire surface of your materials.
-
Distressing tools: Distressing tools, such as edge distressers or distressing brushes, help create a more defined and detailed distressing effect. They allow you to selectively distress specific areas of your paper or embellishments.
-
Craft mat: A craft mat or a non-porous surface is important to protect your workspace from ink stains and to provide a smooth surface for distressing.
Methods for Distressing Paper and Embellishments
Now that you have your tools and supplies ready, let’s explore different methods for distressing paper and embellishments:
-
Edge distressing: Take a piece of sandpaper and gently rub it along the edges of your paper or embellishments. This will remove some of the paper fibers and create a rough, worn edge. Experiment with different sandpaper grits to achieve varying levels of distressing.
-
Ink distressing: Using a distressing ink pad, lightly rub or dab the ink onto the surface of your paper or embellishments. Focus on the areas where wear and tear would naturally occur, such as corners and edges. Use a sponge dauber or a blending tool for a more controlled application.
-
Wrinkle distressing: Crumple your paper or embellishment in your hand to create wrinkles. Smooth it out, then apply distressing ink to the creases and folds. This technique adds dimension and an aged appearance to your materials.
-
Staining distressing: Dilute distressing ink with water and apply it to your paper or embellishments using a brush or a spritz bottle. This will create a subtle wash of color that enhances the vintage or shabby chic feel of your design.
Creating Vintage and Shabby Chic Effects with Distressing
Distressing lends itself particularly well to creating vintage and shabby chic effects in your scrapbooking. Here are a few techniques that can help you achieve these styles:
-
Tea staining: Brew a cup of strong tea and let it cool. Dip a sponge or a brush into the tea and dab it onto your paper or embellishments. The tannins in the tea will create a sepia-toned effect, giving your materials an aged and antique look.
-
Faux stitching: Use a fine-tip marker or a gel pen to create faux stitching along the edges of your distressed paper. This adds a charming and handmade touch that complements the vintage aesthetic.
-
Layering vintage elements: Incorporate vintage-themed elements into your design, such as old photographs, aged ephemera, or delicate lace. Combine these elements with your distressed materials to enhance the overall vintage or shabby chic style.
Distressing is a versatile and creative technique that allows you to achieve an authentic vintage or shabby chic look in your scrapbook pages. Don’t be afraid to experiment with different distressing methods and explore various color combinations to create the perfect aged effect.
Moving on from distressing, let’s discuss the importance of layering in scrapbooking.
Layering
Importance of Layering in Scrapbooking
Layering is a fundamental technique in scrapbooking that adds depth, dimension, and visual interest to your designs. By combining different textures, colors, and shapes, layering allows you to create visually compelling compositions that draw the eye and tell a story. Whether it’s layering patterned papers, die-cut shapes, stickers, or embellishments, this technique can transform your scrapbook pages from flat to fabulous.
Choosing Papers and Embellishments for Layering
When it comes to layering, the key is to select a variety of coordinating papers and embellishments that complement each other. Here are some tips for choosing materials for layering:
-
Mix patterns and textures: Choose papers with different patterns, textures, and scales. Combining stripes, florals, polka dots, and solids can add visual interest and create a dynamic composition. Consider the mood and theme of your scrapbook page to guide your paper selection.
-
Vary sizes and shapes: Combine papers and embellishments of different sizes and shapes to create contrast and focal points. Experiment with rectangles, circles, squares, and intricate die-cut shapes to add intrigue to your layers.
-
Consider color schemes: Stick to a cohesive color scheme or choose complementary colors when selecting your papers and embellishments. This will ensure that the layers harmonize and create a visually pleasing overall composition.
Techniques for Layering Different Elements
Now that you have your materials ready, it’s time to explore different techniques for layering different elements:
-
Paper layering: Start by layering your patterned papers as the base of your design. Cut them into various shapes and sizes to add depth to your layout. Overlapping papers and creating a mix of vertical and horizontal layers can make your design more visually appealing.
-
Embellishment layering: Layer embellishments such as stickers, die-cut shapes, ribbon, or twine on top of your paper layers. Adhere them with adhesive foam dots or squares to create dimension and separation between the layers.
-
Title and journaling layers: Create layers for your titles or journaling by using different fonts, sizes, and colors. Cut them out in different shapes or use stickers or chipboard letters to give them a layered effect.
-
Texture layering: Add texture to your layers by incorporating materials such as fabric, lace, or ribbon. These tactile elements can bring depth and interest to your scrapbook pages.
Creating Dimension and Texture through Layering
Layering offers endless opportunities to create dimension and texture in your scrapbook pages. Here are a few techniques to add depth and visual interest:
-
Pop-up elements: Use adhesive foam dots or squares to elevate certain elements, such as stickers or die-cut shapes, from the page. This creates a 3D effect and adds depth to your layers.
-
Paper folding: Fold or curl the edges of your paper layers to add dimension and a subtle sense of movement. Experiment with simple accordion folds or more intricate origami-inspired folds.
-
Tear and distress: Tear the edges of your paper layers and distress them using distressing ink pads to create a torn or worn look. This adds texture and visual appeal to your layers.
-
Embossing and debossing: Add embossed or debossed elements to your layers using embossing folders or dies. This technique adds tactile texture and dimension to your design.
Layering is a versatile and creative technique that allows you to showcase various elements on your scrapbook pages. By experimenting with different combinations and techniques, you can create visually captivating designs that tell a story and draw the viewer in.
Now that we’ve explored heat embossing, distressing, and layering individually, let’s compare these three techniques and discuss when to use each one.

Heat Embossing vs. Distressing vs. Layering
Comparison of Techniques in Scrapbooking
Heat embossing, distressing, and layering are all valuable techniques that can enhance your scrapbook pages in different ways. Here’s a comparison of these techniques:
-
Heat Embossing: Heat embossing adds a raised and glossy texture to your designs. It can create a focal point, highlight sentiments or titles, and give your pages a touch of elegance.
-
Distressing: Distressing adds an aged and vintage feel to your scrapbook pages. It can evoke nostalgia, soften the look of bold colors, and create a warm and cozy atmosphere.
-
Layering: Layering adds depth and dimension to your designs. It can visually separate and organize different elements, create focal points, and guide the viewer’s eye through your layout.
When to Use Heat Embossing, Distressing, or Layering
Knowing when to use each technique depends on the desired effect and your overall design concept. Here are some guidelines for when to use heat embossing, distressing, or layering:
-
Heat Embossing: Use heat embossing when you want to create a focal point or add elegance to your scrapbook pages. It works particularly well for highlighting sentiments, borders, or intricate designs.
-
Distressing: Incorporate distressing when you want to achieve a vintage or shabby chic look. Use it to add character, evoke nostalgia, or soften the overall feel of your design.
-
Layering: Layering can be used anytime you want to add depth and visual interest to your layouts. It works well for organizing different elements, creating focal points, or guiding the viewer’s eye through your page.
Combining Techniques for Unique Effects
While heat embossing, distressing, and layering can be used individually, they can also be combined to create unique and captivating effects. Don’t be afraid to experiment and push the boundaries of your creativity by incorporating multiple techniques into a single design.
For example, you can heat emboss a sentiment, distress the edges of your paper layers, and then layer them together to create a dimensional and eye-catching element. Or, you can distress your papers and embellishments, then use layering techniques to create depth and texture with different elements.
Examples of Scrapbook Pages Using Multiple Techniques
To inspire your own creations, here are a few examples of scrapbook pages that combine heat embossing, distressing, and layering:
-
Romantic Memories: Heat emboss a delicate lace border, distress the edges of your papers, and layer them together with vintage ephemera and ribbon. This creates a romantic and nostalgic feel.
-
Birthday Celebration: Heat emboss a bold birthday sentiment, distress patterned papers with ink, and layer them with die-cut shapes, stickers, and dimensional embellishments. This creates a festive and dimensional design.
-
Travel Adventure: Heat emboss a compass or map image, distress the edges of your travel-themed papers, and layer them together with photos, tickets, and themed embellishments. This creates a dimensional and wanderlust-inspired layout.
By combining techniques, you can create scrapbook pages that are visually stunning, engaging, and meaningful. Take inspiration from these examples and let your creativity soar as you explore the possibilities of using multiple techniques together.
We’ve covered the individual techniques, compared them, and explored combining them. Now, let’s discuss some additional tips and tricks to enhance your advanced scrapbooking skills.
Advanced Scrapbooking Tips and Tricks
Experimenting with Color Combinations
Don’t be afraid to step outside your comfort zone and experiment with different color combinations in your scrapbook pages. Advanced techniques like heat embossing, distressing, and layering can be enhanced by creative and unexpected color choices. Try pairing contrasting colors for a vibrant and eye-catching effect, or use monochromatic tones for a more subtle and harmonious look. Let your imagination run wild and use colors to evoke emotions, set moods, and tell your unique story.
Incorporating Mixed Media into Scrapbooking
Take your scrapbooking to the next level by incorporating mixed media techniques into your designs. Mixed media involves combining different art mediums, such as paints, pastels, markers, and collage materials, to create texture, depth, and visual interest. Experiment with acrylic paints, watercolors, stencils, and texture pastes to add unique and artistic elements to your scrapbook pages. Mixed media allows for endless creativity and can truly elevate your designs to a whole new level.
Embellishment Placement for Visually Appealing Designs
When it comes to placing embellishments on your scrapbook pages, consider the principles of design and aim for balance and visual appeal. Think about the rule of thirds, which involves dividing your page into a 3×3 grid and placing your embellishments along the lines or at the intersection points. This creates a visually pleasing and harmonious layout. Additionally, consider the flow and movement of your design. Use embellishments to guide the viewer’s eye through your layout, creating a narrative and story within your scrapbook pages.
Using Advanced Techniques to Highlight Photos
Photos are the heart and soul of scrapbooking, and using advanced techniques can help highlight and enhance them. Consider using heat embossing to create frames, borders, or titles around your photos. Distress the edges of your photo mats or use distressing ink to create an aged effect on the edges of your photos. And of course, layering can be used to add dimension and visual interest to your photo arrangements. By using advanced techniques strategically, you can draw attention to your photos and create visually stunning layouts.
With these tips and tricks, you’ll be well-equipped to take your scrapbooking skills to new heights. Remember, the key is to have fun, experiment, and trust your creativity. Now, let’s address some common troubleshooting issues and mistakes to help you avoid or fix them along the way.

Troubleshooting and Common Mistakes
Common Issues with Heat Embossing and Solutions
-
Powder does not stick to the stamped image: Make sure to clean your stamp beforehand to remove any residual ink or oils that may prevent the embossing powder from adhering. You can do this by using stamp cleaner or gently wiping the stamp with a baby wipe.
-
Heat gun overheats or scorches the paper: Keep the heat gun moving in a circular motion to distribute the heat evenly. Hold it about 2-3 inches away from the paper to prevent overheating. Practice on scrap paper first to get a feel for the ideal distance and movement.
-
Embossing powder is not melting completely or appears dull: Ensure that your heat gun is hot enough by letting it preheat for a few seconds before starting. Hold it close enough to the embossing powder without scorching the paper. You can also try using a different brand or type of embossing powder.
Avoiding Over-Distressing in Scrapbook Projects
-
Using too much distressing ink: Start with a small amount of ink on your applicator and gradually build up the color. It’s easier to add more distressing ink later if needed than to remove excess ink.
-
Tearing paper or embellishments unintentionally: When distressing with sandpaper, apply gentle pressure and use a back-and-forth motion. Pay attention to the edges, but avoid excessive force that may tear the paper or damage delicate embellishments.
-
Distressing the entire page excessively: Remember that distressing should be done selectively to create realistic wear and tear. Reserve heavier distressing for the edges and focal points, while keeping the overall design balanced and visually appealing.
Preventing Cluttered Designs with Layering
-
Choosing too many focal points: Be mindful of the number of focal points you include in your design. Layering can easily become overwhelming if too many elements compete for attention. Select a focal point or two, such as a photo or a title, and build your layers around them to maintain a cohesive and visually pleasing composition.
-
Neglecting negative space: Make sure to include areas of negative space within your layers to provide visual rest and balance. Negative space allows the eye to navigate through the design more easily and appreciate the individual elements.
-
Using too many layers: Layering is a powerful technique, but it’s crucial to find the right balance. Too many layers can make your design feel cluttered and visually overwhelming. Remember to step back and assess your layout as you go, removing or rearranging elements if necessary.
Fixing Errors and Salvaging Scrapbook Pages
Mistakes happen, even in advanced scrapbooking. Here are a few tips for fixing errors and salvaging scrapbook pages:
-
Cover mistakes with clever layering: If you make a mistake, such as a smudged stamp or an ink spill, strategically layer other elements, such as patterned papers or embellishments, over the area to hide the mistake.
-
Cut out or crop problematic areas: If a mistake or flaw is limited to a specific section of your page, consider cutting it out or cropping it. You can then salvage the remaining elements by incorporating them into a new design or adhering them onto a different background.
-
Embrace imperfections: Remember that scrapbooking is a creative and artistic process, and mistakes can often turn into happy accidents. Embrace any imperfections and see if they can be incorporated into your overall design. Sometimes, the unexpected can lead to the most unique and interesting results.
Don’t let mistakes discourage you. Embrace them as opportunities for growth, learning, and adding your own personal touch to your scrapbook pages.
Now that we’ve covered troubleshooting and common mistakes, let’s move on to finding inspiration and examples to fuel your creativity.
Inspiration and Examples
Showcasing Scrapbook Projects Using Heat Embossing
Finding inspiration from others is a great way to spark your own creativity. Here are a few scrapbook projects that showcase the use of heat embossing:
-
Romantic Wedding Layout: A wedding layout featuring heat-embossed floral motifs as borders and embossed sentiments. The glossy and raised elements add a touch of elegance and romance to the page.
-
Holiday Greeting Cards: Handmade holiday cards with heat-embossed snowy scenes, embossed sentiments, and intricate embossed designs. The shimmering and textured finish gives the cards a festive and professional look.
-
Anniversary Memory Book: An anniversary memory book decorated with heat-embossed patterns, embossed quotes, and embossed monograms. The embossed elements create a luxurious and personalized touch, highlighting the significance of the milestone.
Take inspiration from these projects and adapt the techniques to suit your own scrapbooking style and themes.
Highlighting Scrapbook Designs with Distressing
When distressing, there are endless possibilities for achieving unique and inspiring designs. Here are a few examples to get your creative juices flowing:
-
Family Heritage Layout: A layout inspired by old family photos, featuring distressed vintage patterns, ink-stained edges, and torn paper elements. The distressed elements evoke nostalgia and capture the essence of family history.
-
Travel Journey Journal: A travel-themed journal with distressed maps, worn postcards, and ink-splattered pages. The distressed elements create a sense of adventure, while the tactile textures transport the viewer to different destinations.
-
Baby Boy’s First Year Album: A baby boy’s first-year album adorned with distressed pastel papers, inked edges, and soft fabric accents. The distressed elements add a sweet and whimsical touch, capturing the joy and innocence of the precious moments.
Let these examples inspire you to experiment with distressing and create designs that reflect your own memories and stories.
Exploring Creative Layering Techniques
Layering opens up a world of possibilities for creating captivating layouts. Here are a few examples of creative layering techniques:
-
Nature-inspired Layout: A layout featuring layered die-cut leaves and flowers, with each layer showcasing different patterns and textures. The layered elements create a vibrant and dimensional nature scene.
-
Vintage Elegance Card: A handmade card with layered lace, ribbon, and vintage ephemera, creating a dimensional and elegant effect. The layers complement each other, enhancing the vintage aesthetic and adding depth to the card.
-
Adventure Travel Scrapbook Page: A travel-themed scrapbook page with layered patterned papers, tags, and three-dimensional embellishments such as buttons and charms. The layers bring the page to life and give a sense of adventure and exploration.
Let these examples spark your imagination and motivate you to explore new layering techniques in your own creations.
Now that you’ve been inspired by various scrapbook projects, it’s time to reflect on the benefits of advancing your scrapbooking skills.

Taking Your Scrapbooking to the Next Level
Benefits of Advancing Your Scrapbooking Skills
Advancing your scrapbooking skills through the exploration of advanced techniques offers several benefits:
-
Personal growth: By challenging yourself with new techniques and skills, you’ll experience personal growth and a sense of accomplishment. You’ll continually push your creative boundaries and develop new perspectives on crafting.
-
Enhanced creativity: Advanced scrapbooking techniques allow you to think outside the box and experiment with different materials and methods. This fosters a mindset of creativity and innovation that can extend beyond your scrapbooking projects and into other aspects of your life.
-
Professional-looking results: Mastering advanced techniques enables you to create professional-looking scrapbook pages that impress others and stand out from the crowd. Your skills will be evident in the intricate details, refined finishes, and overall polished appearance of your designs.
Pushing Boundaries and Stepping Out of Comfort Zones
To truly advance your scrapbooking skills, it’s important to push boundaries and step out of your comfort zone. Challenge yourself to try new techniques, experiment with different materials, and explore unconventional design choices. Taking risks and embracing new possibilities will fuel your creativity and lead to innovative and stunning scrapbooking projects that reflect your personal style.
Joining Scrapbooking Communities and Workshops
Engaging with other scrapbookers through online communities, social media groups, or local workshops can provide you with invaluable support, inspiration, and feedback. Joining these communities allows you to connect with like-minded people who share your passion for scrapbooking. It also provides opportunities to learn from experienced crafters, participate in challenges, and discover new techniques or trends. Collaboration and sharing within a community can greatly enhance your scrapbooking journey and open doors to new opportunities.
Challenging Yourself with Advanced Scrapbook Projects
As you build confidence in your skills, challenge yourself by taking on more complex and ambitious scrapbook projects. Push your boundaries by experimenting with intricate designs, incorporating multiple techniques, or tackling themes that require advanced techniques. Each new challenge will stretch your abilities, expand your creative repertoire, and pave the way for continued growth and improvement.
With determination, perseverance, and an open mind, you can truly elevate your scrapbooking skills to new heights. Let your passion for creativity guide you as you embark on this exciting journey.
Conclusion
Congratulations on completing this comprehensive article on advanced scrapbooking techniques! We hope you’ve found inspiration, guidance, and valuable information to take your scrapbooking skills to the next level. Remember, advanced techniques such as heat embossing, distressing, and layering offer unlimited opportunities for creativity, personal expression, and growth. Whether you choose to incorporate one technique or combine them for unique effects, the key is to have fun, experiment, and trust your creative instincts. As you continue on your scrapbooking journey, always remember that your pages are a reflection of your memories, stories, and the love and passion you pour into each project. Embrace every opportunity to explore, experiment, and create beautiful scrapbook pages that will be cherished for generations to come.
+3000 words.