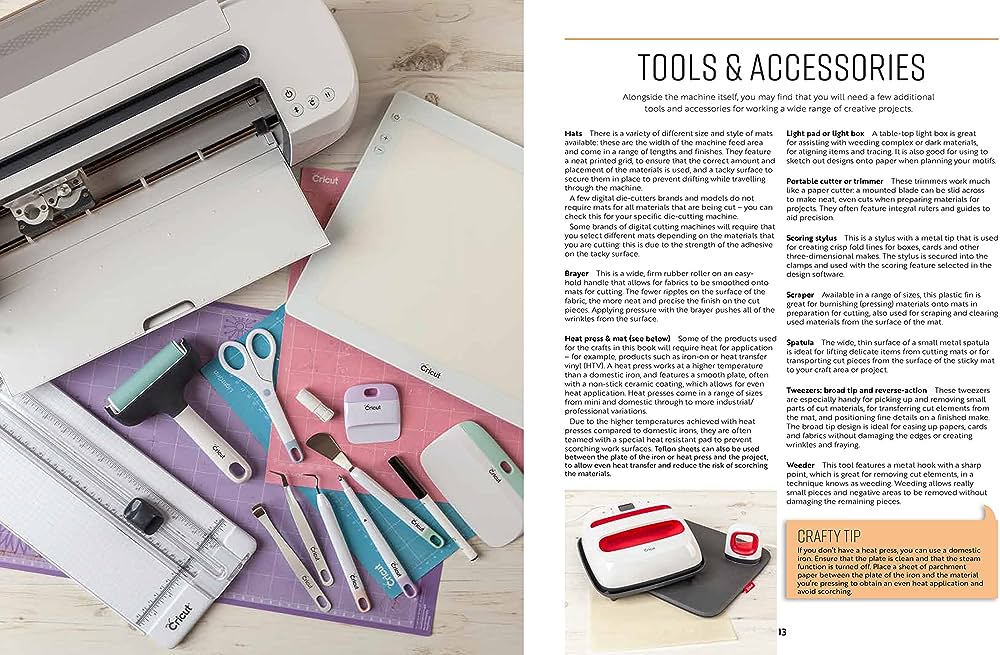
Crafting Magic: Unleash Your Creativity with Die-Cutting Machines. In this article, we’ll explore the wonderful world of die-cutting machines and how they can elevate your crafting game. From creating intricate designs for scrapbook pages to personalized cards and decorations, these machines are a game-changer for any craft enthusiast. Join us as we delve into step-by-step tutorials and creative ideas to help you maximize the use of die-cutting machines and unlock your artistic potential. Let your imagination run wild and watch as these magical tools bring your crafts to life. Get ready to embark on a crafting adventure like no other!
1. Understanding Die-Cutting Machines
Die-cutting machines are a versatile tool for crafters and hobbyists that allow you to cut out intricate shapes and designs with precision. Whether you’re a beginner or an experienced crafter, understanding how these machines work and choosing the right one for your needs is essential. In this section, we will explore the inner workings of die-cutting machines, the different types available, and how to select the perfect machine for your projects.
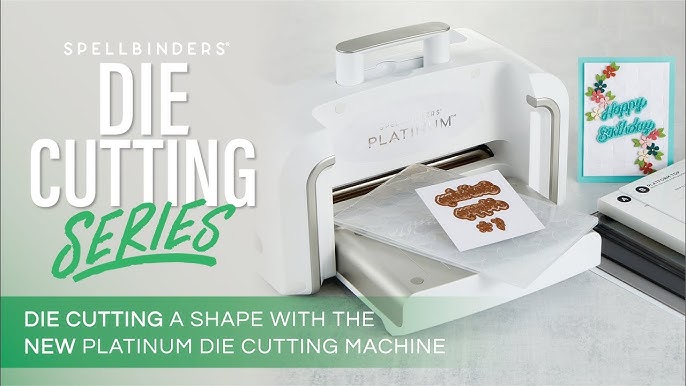
1.1 How Do Die-Cutting Machines Work?
Die-cutting machines work on a simple yet effective principle. They use sharp blades or metal dies to cut through various materials, such as paper, cardstock, fabric, or foam. The blades or dies are attached to a base, either manually or electronically, which moves back and forth as you operate the machine.
To use a die-cutting machine, you first need to choose a shape or design that you want to cut. This can be a pre-made die-cut shape or a custom design created using die-cutting software. Once you have your design, you place your material between the cutting plates of the machine and secure it in place.
When you activate the machine, the cutting plates move, applying pressure to your material. As the plates move back and forth, the blades or dies cut through the material, creating the desired shape. Once the cutting process is complete, you can remove your perfectly cut shape from the machine.
1.2 Types of Die-Cutting Machines
There are several types of die-cutting machines available in the market, each with its own unique features and capabilities. Here are some of the most common types:
Manual Die-Cutting Machines
Manual die-cutting machines are operated by hand, requiring you to turn a crank or handle to move the cutting plates and apply pressure to your material. These machines are often more affordable and compact, making them a popular choice for beginners or hobbyists with limited space. Manual die-cutting machines can cut through various materials, but the cutting pressure may be limited compared to electronic machines.
Electronic Die-Cutting Machines
Electronic die-cutting machines are powered by electricity and feature motorized components that move the cutting plates and apply pressure to your material. These machines are often more expensive than manual ones but offer greater precision, cutting speed, and cutting pressure control. Electronic die-cutting machines often come with built-in software or connectivity options, allowing you to create and cut custom designs.
Computerized Die-Cutting Machines
Computerized die-cutting machines are the most advanced type available. These machines are connected to a computer or tablet and are controlled entirely through software. They offer the most versatility and precision, allowing you to create intricate designs and cut multiple layers of different materials simultaneously. Computerized die-cutting machines are often used by professional crafters or those who require advanced features for their projects.
1.3 Choosing the Right Die-Cutting Machine
When choosing a die-cutting machine, there are several factors to consider to ensure you get the right one for your needs. Here are some key points to keep in mind:
Project Requirements
Consider the types of projects you plan to create with your die-cutting machine. If you primarily work on small projects like cards or scrapbook pages, a manual or electronic machine may suffice. However, if you need to cut larger designs or work with multiple layers of thick materials, a computerized machine may be a better choice.
Budget
Determine your budget for a die-cutting machine, as prices can vary significantly depending on the type and brand. Manual machines, being less advanced, are generally more economical, while computerized machines can be quite expensive. Consider the long-term value and features you require when setting your budget.
Space and Portability
Consider the size and portability of the machine, especially if you have limited space in your crafting area or if you plan to take your machine to workshops or classes. Manual machines are generally more compact and lightweight, making them easier to transport.
Features and Compatibility
Evaluate the features and compatibility options offered by different machines. Consider factors such as the ability to use both pre-made dies and custom designs, software compatibility, and the availability of additional accessories or tools.
By considering these factors, you can choose a die-cutting machine that meets your project requirements, budget, space limitations, and desired features.
2. Exploring the Possibilities of Die-Cutting
Die-cutting opens up a world of creative possibilities, allowing you to add intricate designs and shapes to various crafts and projects. In this section, we will explore how die-cutting can be used in different areas of crafting, including scrapbooking, card making, home decor, paper crafts, fabric crafts, and educational purposes.
2.1 Die-Cutting for Scrapbooking
Scrapbooking is a popular crafting hobby that involves preserving memories through photos and decorative elements. Die-cutting machines are a valuable tool for creating custom embellishments and decorations for your scrapbook pages. With die-cutting, you can easily cut out shapes, titles, frames, and borders that add visual interest and dimension to your layouts.
To use die-cutting in scrapbooking, start by selecting the shape or design you want to cut. This can be a specific element that complements your theme, such as flowers or stars, or a background shape like a circle or rectangle. Once you have chosen your design, load your chosen material into the die-cutting machine and position the die over it. Run the machine, and you will have a perfectly cut shape ready to be adhered to your scrapbook page.
2.2 Die-Cutting for Card Making
Card making is a creative way to show someone you care, and die-cutting machines can take your handmade cards to the next level. With a die-cutting machine, you can effortlessly create intricate card fronts, sentiments, and decorative elements that will impress the recipient.
To use die-cutting in card making, start by choosing your card base and any additional layers you want to include. Then, select the die or dies you want to use to cut out your desired shapes. You can create card fronts with detailed designs or cut out sentiments to add a personal touch to your cards. Once you have your materials ready, run them through the die-cutting machine, and you will have perfectly cut pieces to assemble into a beautiful handmade card.
2.3 Die-Cutting for Home Decor
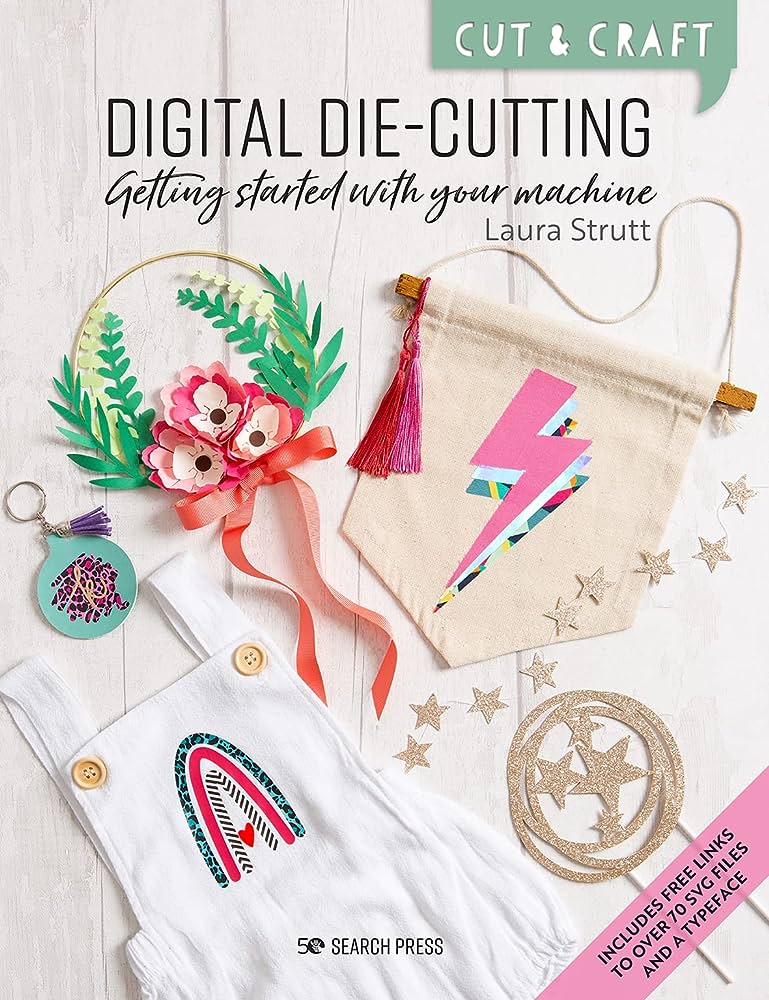
Die-cutting machines are not limited to crafting cards and scrapbook pages; they can also be used to create unique and personalized home decor pieces. With various dies and materials, you can make wall art, decorative pillows, framed designs, and more.
To use die-cutting for home decor, consider the theme or style you want to achieve. For example, if you’re going for a botanical-themed decor, choose floral or leaf-shaped dies to cut out designs from fabric or cardstock. Once you have your die-cut pieces, you can attach them to canvas, pillows, or frames to create eye-catching decor items for your living spaces.
2.4 Die-Cutting for Paper Crafts
Die-cutting is a game-changer for paper crafters. From handmade journals and notebooks to gift tags and party decorations, die-cutting machines make it easy to cut out intricate shapes consistently. Whether you’re working with cardstock, patterned paper, or specialty papers, the precision of die-cutting ensures professional-looking results.
To incorporate die-cutting into your paper crafts, consider the specific projects or paper crafts you enjoy. For example, if you’re making a gift box, you can use a die to cut out a decorative closure or a window to view the contents inside. Experiment with different dies and materials to add unique elements to your paper crafts and take them to a new level.
2.5 Die-Cutting for Fabric Crafts
Die-cutting machines are not just for paper crafts; they can also be used in fabric crafts. Whether you enjoy sewing, quilting, or creating fabric appliques, a die-cutting machine can simplify the process and save time.
To use die-cutting for fabric crafts, start by selecting the fabric you want to cut. Fabrics like cotton and felt work well with die-cutting machines. Choose dies that are specifically designed for fabric or have a compatible adapter for fabric cutting. Once you have your fabric and die ready, place them between the cutting plates of the machine, and let the machine do the work. You’ll have perfectly cut fabric shapes in no time, ready to be incorporated into your sewing or quilting projects.
2.6 Die-Cutting for Educational Purposes
Die-cutting machines have educational applications and can be a valuable tool for teachers, parents, and homeschoolers. By using educational dies, you can create fun and interactive learning materials, such as flashcards, puzzles, shapes, and letters.
To use die-cutting for educational purposes, start by selecting educational dies that align with the learning objectives or topics you want to cover. For example, if you’re teaching letter recognition, you can use alphabet-shaped dies to cut out letters from various materials. With these cutouts, you can create activities that engage children in hands-on learning. Die-cutting can make learning more enjoyable and effective, allowing for creative and interactive educational experiences.
3. Getting Started with Die-Cutting
Now that you understand the basics of die-cutting and how it can be applied to different crafts, it’s time to dive into the practical side. In this section, we will explore the essential tools and materials you need to get started with die-cutting, basic die-cutting techniques, and troubleshooting common issues that may arise.
3.1 Essential Tools and Materials
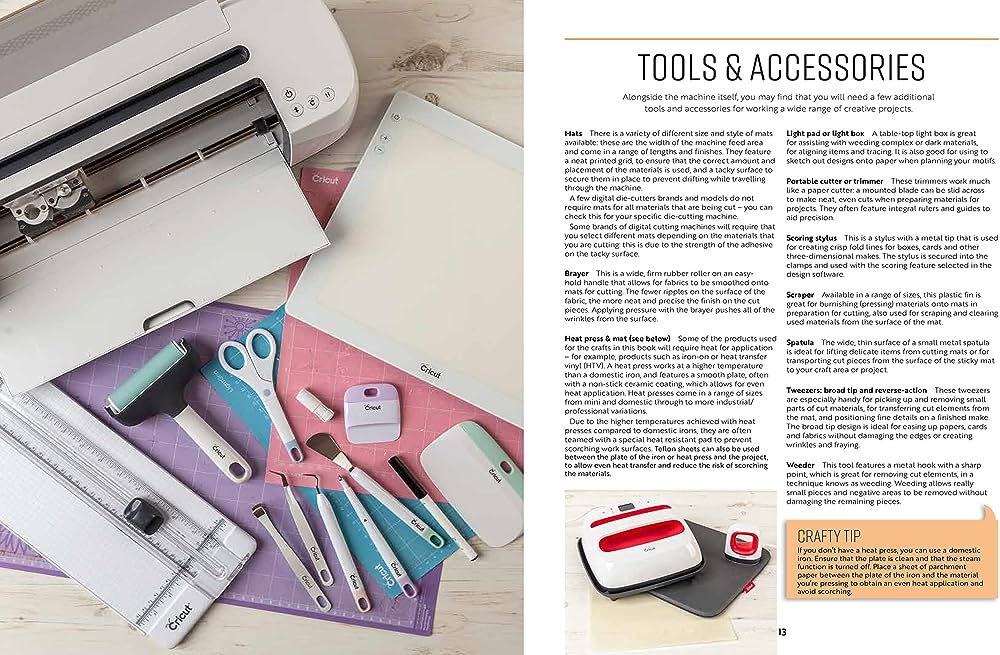
Before you can start using your die-cutting machine, there are a few essential tools and materials you need to have on hand. These include:
- Die-Cutting Machine: As discussed earlier, you will need a die-cutting machine of your choice.
- Dies: Select a variety of dies that suit the projects you want to create. Consider shapes, sentiments, frames, and borders to create a well-rounded collection.
- Cutting Plates: Most die-cutting machines come with a set of cutting plates. These plates are used to apply pressure to your material and protect the machine’s components.
- Materials: Choose different types of materials to experiment with, such as paper, cardstock, fabric, foam, and felt. Make sure these materials are compatible with your die-cutting machine.
- Adhesive: Depending on your projects, you may need adhesive to attach your die-cut shapes to other surfaces. Options include double-sided tape, glue sticks, liquid glue, or adhesive dots.
- Scissors and Tweezers: Scissors and tweezers can come in handy when cleaning up loose threads or small leftover pieces.
Having these basic tools and materials ready will ensure a smooth die-cutting experience and allow you to start creating right away.
3.2 Basic Die-Cutting Techniques
To achieve the best results with your die-cutting machine, it’s essential to master some basic die-cutting techniques. These techniques will help you get clean and precise cuts every time. Here are a few techniques to consider:
-
Correct Plate Sandwich: The plate sandwich refers to the layers of materials you need to create for die-cutting. Always consult your machine’s user manual for specific instructions on plate sandwiches for different materials. Typically, the sandwich includes a bottom cutting plate, your material, the die with the cutting side down, and a top cutting plate. Make sure the plates are aligned and securely in place before running them through the machine.
-
Testing Pressure Settings: Different materials require different levels of cutting pressure. To find the optimal pressure for your materials, start with the lowest setting and gradually increase it until you achieve clean cuts without excessive tearing or resistance.
-
Rotating and Flipping Dies: Rotate or flip your dies during cutting to ensure even wear and tear and extend the lifespan of your dies. This technique prevents overuse of specific areas and ensures consistent cutting results.
-
Nesting Dies: Nesting dies involve using multiple dies of different sizes within each other to create layered or framed designs. Experiment with different nesting combinations to add depth and interest to your projects.
-
Partial Die-Cutting: Partial die-cutting allows you to cut only a portion of your design, leaving some areas intact. To achieve this, position your material and die within the cutting plates, making sure to only cover the desired areas with the plates. By selecting areas to cut and areas to leave untouched, you can create interactive elements or unique effects in your projects.
By mastering these techniques, you can make the most of your die-cutting machine and achieve professional-looking results.
3.3 Troubleshooting Common Die-Cutting Issues
While die-cutting machines are generally reliable, there may be instances where you encounter certain issues. Understanding and troubleshooting these common problems can save you time and frustration. Here are a few common die-cutting issues and possible solutions:
-
Incomplete Cuts: If your machine is not cutting all the way through your material, check the cutting pressure. Increase the pressure incrementally until you achieve clean and complete cuts.
-
Tearing or Fraying: Tearing or fraying can occur if the cutting pressure is too high or if your material is too delicate. Try reducing the pressure or consider using a stabilizing material, such as adhesive paper or cardstock, to reinforce your material before cutting.
-
Stuck or Jammed Plates: If your cutting plates get stuck or jammed in the machine, avoid forcing them out. This can damage the machine. Instead, refer to the user manual for instructions on how to safely remove and reposition the plates.
-
Dull Blades or Dies: Over time, blades or dies may become dull, resulting in less precise cuts or tearing. Regularly inspect and clean your blades and dies, and replace them when necessary to maintain optimal cutting performance.
-
Materials Shifting: If your materials shift during the cutting process, consider using low-tack tape or adhesive to secure them in place. This will ensure that your cuts are in the intended positions.
By troubleshooting and addressing these common issues, you can ensure smooth and successful die-cutting sessions.
4. Choosing and Using Die-Cuts
Once you have become familiar with your die-cutting machine and have mastered the basic techniques, it’s time to take your projects to the next level by incorporating die-cuts. In this section, we will explore how to choose and use die-cuts effectively to enhance your designs.
4.1 Understanding Die-Cut Shapes and Designs
Die-cuts come in a wide variety of shapes, sizes, and designs. Understanding the different types of die-cut shapes and designs will help you make informed choices when selecting or creating your own die-cuts.
Basic Shapes:
Basic shapes include circles, squares, rectangles, and triangles. These versatile shapes can be used as backgrounds, frames, or layering elements in different craft projects.
Sentiments and Titles:
Die-cuts with sentiments and titles add a personal touch to your projects. They can include words like “Happy Birthday,” “Thank You,” or “Congratulations,” allowing you to convey specific messages.
Borders and Frames:
Borders and frames can be used to add visual interest and draw attention to certain areas of your projects. You can find die-cuts in a variety of border styles, such as scalloped edges, stitched borders, or intricate patterns.
Icons and Embellishments:
Icons and embellishments are popular die-cut designs that can enhance the theme or story of your projects. These can include flowers, hearts, stars, animals, or other decorative elements.
Intricate Designs:
Intricate designs are highly detailed and often require advanced die-cutting techniques. These designs can be floral patterns, lace borders, intricate mandalas, or filigree motifs.
When choosing die-cut shapes and designs, consider the theme, style, and purpose of your project. Whether you prefer simplicity or intricate designs, there are die-cuts available to suit your creative vision.
4.2 Purchasing Die-Cuts
Die-cuts can be purchased from craft stores, online retailers, or directly from manufacturers. When purchasing die-cuts, consider the following:
- Quality: Choose die-cuts made from high-quality materials to ensure durability and clean cuts. Look for reputable brands or read customer reviews to gauge the quality of the die-cuts.
- Compatibility: Check if the die-cuts you are interested in are compatible with your die-cutting machine. Some machines have specific size or compatibility requirements, so it’s important to double-check before making a purchase.
- Versatility: Select die-cuts that can be used for multiple projects and purposes. Versatile die-cuts can be used in various crafts, allowing you to maximize your investment.
- Collections or Sets: Consider purchasing die-cut collections or sets that include coordinated designs. These collections often feature complementary shapes and designs, making it easier to create cohesive projects.
By considering these factors, you can build a collection of die-cuts that enhance your creativity and provide endless possibilities for your crafting projects.
4.3 Creating Custom Die-Cuts
Aside from purchasing pre-made die-cuts, you can also create your own custom designs using various methods. Creating custom die-cuts allows you to have complete control over the size, shape, and design, allowing for more personalized and unique projects. Here are a few methods for creating custom die-cuts:
Hand-Drawn Designs:
If you have artistic skills, you can draw your own designs directly on paper or cardstock. Once drawn, you can either cut them out by hand or scan and convert them into digital files for electronic die-cutting machines. This method allows for complete artistic freedom and customization.
Digital Die-Cutting Software:
Digital die-cutting software, often included with electronic or computerized die-cutting machines, allows you to create custom designs on your computer or tablet. These designs can be saved as digital files and then sent to your machine for cutting. Many software programs provide a library of pre-designed shapes and fonts, making it easy to create personalized die-cuts.
Die-Cut Machines with Scanning Capabilities:
Some advanced die-cutting machines have built-in scanners that allow you to scan and cut custom designs. With this method, you can scan existing images, drawings, or templates, and the machine will create precise cutouts based on the scanned image.
Online Templates and Designs:
Various websites and online platforms offer free or paid templates and designs for die-cutting. These templates can be downloaded and used with your die-cutting machine. This method is particularly useful if you are looking for specific shapes, patterns, or themes.
By exploring these custom die-cutting methods, you can add a personal touch to your projects and create truly one-of-a-kind designs.
5. Enhancing Your Die-Cut Designs
Once you have mastered the art of die-cutting and become comfortable using die-cuts in your projects, it’s time to explore ways to enhance and elevate your designs. In this section, we will delve into techniques for embossing and debossing, adding color and texture to die-cuts, and incorporating die-cuts into mixed media projects.
5.1 Embossing and Debossing Techniques
Embossing and debossing are techniques that add texture and dimension to die-cut designs. These techniques create raised or recessed areas on your die-cut shapes, enhancing their visual appeal.
Dry Embossing:
Dry embossing is a technique that uses embossing folders or stencils to create raised patterns on your die-cut shapes. To dry emboss, simply sandwich your die-cut shape between an embossing folder and run it through a manual die-cutting machine. The pressure from the machine will create raised areas, adding texture and depth to your die-cut designs.
Heat Embossing:
Heat embossing is a technique that involves adding a raised or glossy finish to die-cut designs using embossing powders and heat. To heat emboss, stamp an image or sentiment on your die-cut shape using embossing ink, sprinkle embossing powder over the wet ink, tap off the excess powder, and heat it with a heat tool until the powder melts and becomes shiny and raised.
Debossing:
Debossing is the opposite of embossing, creating recessed areas on your die-cut shapes. Debossing is achieved by using specific dies or materials designed for debossing. Simply run your die-cut shape through your die-cutting machine with the debossing materials, and it will create indented areas within the shape.
By incorporating embossing and debossing techniques into your die-cut designs, you can add texture, dimension, and visual interest to your projects.
5.2 Adding Color and Texture to Die-Cuts
While die-cuts look beautiful on their own, adding color and texture can take them to a whole new level. Here are a few techniques to consider:
Ink Blending:
Ink blending involves using ink pads or blending tools to apply color to your die-cut shapes. Start by selecting the colors you want to use and apply them in a soft sweeping motion, gradually building up the intensity. This technique adds depth and dimension to your die-cuts, making them stand out.
Stamping and Coloring:
Stamping and coloring techniques can be used to add intricate details to your die-cuts. Stamp images or patterns onto your die-cut shapes using ink and stamps, and then color them with markers, colored pencils, or watercolor paints. This combination of stamping and coloring creates unique and personalized die-cut designs.
Patterned Papers and Materials:
To add instant color and texture to your die-cuts, use patterned papers or materials. Patterned papers come in a variety of designs and colors, allowing you to easily coordinate your die-cut shapes with your overall project. Additionally, consider using specialty materials like glitter cardstock, metallic foil, or embossed papers to add visual interest and sparkle to your die-cut designs.
By incorporating these color and texture techniques, you can bring your die-cut designs to life and make them truly eye-catching.
5.3 Incorporating Die-Cuts into Mixed Media Projects
Mixed media projects involve combining different art mediums and materials to create unique and multidimensional artwork. Die-cutting can be a valuable addition to mixed media projects, offering endless possibilities for experimentation. Here are a few ideas for incorporating die-cuts into mixed media projects:
Collages and Assemblages:
Use die-cuts as elements in collages or assemblages. Arrange and layer die-cut shapes with other materials like papers, fabrics, found objects, or photographs, creating visually textured and dynamic compositions.
Art Journals and Mini Albums:
Dies can be used to create intricate backgrounds, focal points, or interactive elements in art journals or mini albums. Experiment with different die-cut shapes and designs to add interest and depth to your pages.
Textural Elements:
Use die-cuts to create textural elements in your mixed media projects. Consider using materials like foam, fabric, or acetate to add tactile interest to your designs.
Altered Art:
Transform ordinary objects into works of art by incorporating die-cut elements. Die-cut shapes and designs can be adhered to various surfaces like frames, boxes, or wooden blocks, adding a whimsical or decorative touch to everyday items.
The versatility of die-cutting makes it an exciting addition to any mixed media project, allowing you to explore new techniques and create truly unique art pieces.
6. Advanced Die-Cutting Techniques
Once you have mastered the basics of die-cutting and explored various techniques, it’s time to take your skills to the next level with advanced die-cutting techniques. In this section, we will delve into layering and shadowing with die-cuts, creating interactive pop-up cards, and designing 3D paper structures.
6.1 Layering and Shadowing with Die-Cuts
Layering and shadowing with die-cuts can create depth and dimension in your projects, making them visually stunning. Here’s how you can achieve layering and shadowing effects:
Layering:
Layering involves stacking multiple die-cut shapes on top of each other to create dimension. Choose dies in different sizes and colors, cut them out, and layer them using strategic adhesive placement. By varying the size and color of the die-cuts, you can add visual interest and depth to your designs.
Shadowing:
Shadowing adds a realistic touch to your die-cut shapes by mimicking the effect of light and shadow. To create a shadow, die-cut the shape twice: once in the desired color and once in a darker shade. Offset the darker shade slightly behind the main shape, creating a subtle shadow effect. This technique adds depth and realism, making your die-cut designs appear more three-dimensional.
By incorporating layering and shadowing techniques, you can elevate your die-cut designs and create visually stunning projects.
6.2 Creating Interactive Pop-Up Cards
Pop-up cards are a delightful way to surprise and engage the recipient. With die-cutting machines, you can easily create intricate pop-up mechanisms that bring your cards to life. Here’s how to create interactive pop-up cards:
Select the Base Card:
Start by choosing a sturdy cardstock as your base card. This will provide stability and support for the pop-up mechanisms.
Choose a Pop-Up Mechanism:
Select a pop-up mechanism that suits your design idea and skill level. There are many options available, such as box pop-ups, accordion pop-ups, or v-fold pop-ups. Consult tutorials or guides specific to your chosen mechanism for detailed instructions.
Design and Die-Cut the Elements:
Design and die-cut the elements for your pop-up card using your chosen dies and materials. Consider the theme and recipient of your card when selecting shapes and designs.
Assemble the Pop-Up Mechanism:
Follow the instructions for your chosen pop-up mechanism to assemble the different components. Ensure that the pop-up mechanism is securely attached to the base card.
Add Embellishments:
Once the pop-up mechanism is in place, embellish your card with additional die-cut shapes, sentiments, or decorative elements. This will enhance the overall design and make your pop-up card even more visually appealing.
Creating interactive pop-up cards with die-cutting machines is a rewarding and impressive way to showcase your creativity and craftsmanship.
6.3 Designing 3D Paper Structures
With advanced die-cutting techniques, you can create intricate and impressive 3D paper structures. These structures can be used for home decor, party decorations, or display pieces. Here’s how you can design your own 3D paper structures:
Select a Template or Design:
Start by choosing a template or design for your 3D paper structure. This can be found in die-cutting machine software, online templates, or by creating your own design.
Cut and Score:
Using your die-cutting machine, cut out the various pieces needed for your 3D structure. Also, score along the fold lines to make it easier to assemble the structure later.
Assemble the Structure:
Follow the instructions or template to assemble the different pieces and create your 3D structure. Use adhesive to secure the pieces together, ensuring a sturdy construction.
Add Finishing Touches:
Once the structure is assembled, add any desired embellishments, such as additional die-cut shapes, colors, or textures. This will add visual interest and enhance the overall design of your 3D paper structure.
Designing 3D paper structures with die-cutting machines allows you to push the boundaries of your creativity and create impressive and unique art pieces.
7. Maintenance and Care for Die-Cutting Machines
To ensure the longevity and optimal performance of your die-cutting machine, regular maintenance and care are essential. In this section, we will explore how to clean and lubricate your die-cutting machine, troubleshoot common machine issues, and extend the lifespan of your machine.
7.1 Cleaning and Lubricating Die-Cutting Machines
Cleaning your die-cutting machine regularly will help prevent dust, debris, or adhesive buildup that can affect the smooth operation of the machine. Here’s how you can clean your machine:
- Turn off and unplug your machine: Before cleaning your die-cutting machine, make sure it is turned off and unplugged for safety.
- Remove scrap materials: Gently remove any remaining scrap materials or excess adhesive from the cutting plates, dies, or rollers. Use a soft brush, tweezers, or a lint-free cloth for this task.
- Clean the cutting plates: Wipe the cutting plates with a damp cloth or a cleaning solution recommended by the machine manufacturer. Avoid using harsh chemicals or abrasive cleaners that can damage the plates.
- Lubricate movable parts: Follow the manufacturer’s instructions to lubricate any movable parts of your machine. Use a lubricant specifically formulated for die-cutting machines to ensure smooth operation.
Regular cleaning and lubrication will keep your die-cutting machine in excellent condition and extend its lifespan.
7.2 Troubleshooting Common Machine Issues
Even with regular maintenance, you may encounter some issues with your die-cutting machine. Here are a few common problems and possible solutions:
-
Machine Not Cutting Properly: If your machine is not cutting properly, ensure that the materials are placed correctly, and the plates are securely positioned. Check the cutting pressure and make sure it is set appropriately for your material.
-
Stuck or Jammed Plates: If your cutting plates get stuck or jammed, avoid forcing them out. Consult your machine’s user manual for instructions on how to safely remove and reposition the plates.
-
Uneven Cuts: Uneven cuts can occur if your machine’s pressure is not distributed evenly across the cutting area. Try adjusting the pressure or using additional shims or materials to achieve even pressure distribution.
-
Machine Making Unusual Noises: If your machine is making unusual noises, check for any loose or obstructing parts. Tighten any loose screws or fasteners and remove any debris that may be interfering with the machine’s operation.
Always refer to your machine’s user manual for specific troubleshooting tips and guidelines.
7.3 Extending the Lifespan of Your Die-Cutting Machine
To extend the lifespan of your die-cutting machine and maintain its optimal performance, consider the following tips:
- Use Compatible Materials: Use materials that are recommended or certified for your specific die-cutting machine. Using incompatible or unsuitable materials can lead to premature wear and tear or damage to the machine’s components.
- Handle with Care: Handle your machine with care, avoiding excessive force or rough handling. This includes placing materials gently between the cutting plates and engaging the machine’s mechanisms smoothly to prevent unnecessary strain on the machine.
- Store Properly: When not in use, store your die-cutting machine in a dry, dust-free environment, such as a dedicated craft storage area or a protective carrying case. This will help protect it from environmental factors that can deteriorate or damage its components.
- Update Firmware or Software: If your machine has firmware or software, periodically check for updates from the manufacturer and install them as needed. Updates often include bug fixes, performance enhancements, and new features that can improve your machine’s functionality and durability.
By following these maintenance tips and handling your die-cutting machine with care, you can ensure its longevity and enjoy years of crafting creativity.
8. Die-Cutting Tips and Tricks
To make the most of your die-cutting experience and maximize the use of your materials, here are some useful tips and tricks:
8.1 Organizing and Storing Die-Cuts
- Use storage solutions like binders, folders, or labeled boxes to organize and store your die-cuts. This will make it easier to find specific shapes or designs when you need them.
- Consider using clear plastic pockets or sleeves to store and protect your die-cuts. This will prevent them from getting damaged or lost.
- Label your die-cut storage solutions for quick reference. Group similar shapes or designs together to streamline your crafting process.
8.2 Maximizing Material Usage
- When die-cutting, try to position your shapes strategically on the material to minimize waste. This can be achieved by arranging your dies in a puzzle-like manner, cutting multiple shapes from a single sheet of material.
- Consider using smaller scraps of materials for die-cutting smaller or intricate designs. This way, you can make the most of your leftover pieces.
- Experiment with different orientations and angles to fit as many shapes as possible on your material. Rotate dies or position them diagonally to optimize material usage.
8.3 Using Die-Cuts as Stencils
- Die-cuts can be used as stencils to add patterns, shapes, or outlines to your projects. Simply place the die-cut shape on your project surface and apply ink, paint, or other coloring mediums over it.
- Use temporary adhesive or low-tack tape to secure the die-cut stencil in place to prevent any movement while applying color.
- Experiment with different colors, techniques, and mediums when using die-cut stencils to create unique and personalized effects.
By implementing these tips and tricks, you can make the most of your die-cutting process and materials, resulting in efficient and creative projects.
9. Inspirational Projects and Ideas
Now that you have a solid understanding of die-cutting machines, techniques, and possibilities, it’s time to get inspired and take your creativity to new heights. In this section, we will explore various inspirational project ideas to get your creative juices flowing.
9.1 Creating Intricate Scrapbook Layouts
- Design a floral-themed scrapbook page using die-cut flowers, leaves, and intricate borders.
- Create a layered and interactive scrapbook page with pop-up elements using different pop-up mechanisms.
- Make a travel-themed scrapbook layout featuring die-cuts of iconic landmarks, maps, and travel-related sentiments.
9.2 Designing Unique Greeting Cards
- Craft a birthday card with a dimensional cake pop-up using a box pop-up mechanism.
- Create an elegant wedding card with intricate lace die-cuts and vellum overlays.
- Make a festive holiday card featuring die-cut snowflakes, ornaments, and sentiments.
9.3 Making Personalized Home Decor Pieces
- Design a personalized monogram wall art using large letter die-cuts and patterned paper.
- Create a decorative wreath using die-cut flowers, leaves, and a wooden frame.
- Craft a set of custom drawer knobs using die-cuts covered in resin for a unique and whimsical touch.
9.4 Crafting Tactile Paper Crafts
- Make a pop-up book with die-cut characters and scenes that come to life as the pages are turned.
- Create a set of interactive puzzles using die-cut shapes that fit together to form a larger design.
- Craft a paper sculpture using multiple layers of die-cut shapes to create depth and visual interest.
9.5 Sewing and Quilting with Die-Cuts
- Incorporate fabric die-cuts into patchwork or quilted projects, adding unique design elements.
- Create personalized fabric ornaments using die-cut shapes, fabric glue, and decorative stitching.
- Craft fabric appliques with intricate die-cut patterns to embellish clothing, bags, or home decor items.
By trying out these inspirational projects, you can showcase the incredible creative potential of die-cutting machines and unleash your imagination.
10. Die-Cutting Safety Precautions
When using die-cutting machines, it’s important to prioritize safety to prevent accidents or injuries. Here are some safety precautions to keep in mind:
10.1 Understanding Machine Safety Guidelines
- Familiarize yourself with the safety guidelines provided by the manufacturer of your die-cutting machine. These guidelines often include information about operating procedures, electrical safety, and recommended materials.
- Always handle your die-cutting machine with care and avoid placing your fingers or other body parts near the cutting area when the machine is in operation.
10.2 Proper Handling of Sharp Die-Cutting Tools
- Keep sharp blades, dies, or other cutting tools out of reach of children and pets. Store them securely in protective cases or containers when not in use.
- When handling sharp cutting tools, wear appropriate protective gear such as gloves or finger guards to prevent accidental cuts.
10.3 Protecting Your Workspace and Yourself
- Ensure that your workspace is well-ventilated to prevent the buildup of dust or fumes that may be generated during the die-cutting process.
- Use a cutting mat or protective surface to avoid damaging your workspace or surfaces when operating the die-cutting machine.
- Follow proper ergonomics and posture when using your die-cutting machine to prevent strain or injuries. Take breaks and stretch regularly to prevent fatigue.
By adhering to these safety precautions, you can enjoy a safe and fulfilling die-cutting experience.

