
In “Embellish Your Scrapbook Pages like a Pro,” discover a world of endless creativity as you explore different ways to enhance your scrapbook pages. From stickers and die-cuts to ribbons and brads, this article serves as your ultimate guide to embellishing your pages with flair. Unleash your inner artist and learn creative techniques that will take your scrapbooking skills to the next level. Let the embellishments galore be your inspiration and watch as your scrapbook pages transform into works of art.


Choosing the Right Embellishments
When it comes to creating beautiful and eye-catching scrapbook pages, choosing the right embellishments is key. Whether you’re documenting a special occasion, a memorable trip, or simply showcasing everyday moments, the embellishments you select can enhance the theme and style of your pages.
Consider the Theme and Style of Your Scrapbook Pages
Before you dive into selecting embellishments, take a moment to consider the theme and style of your scrapbook pages. Are you creating a layout for a wedding, a baby shower, or a vacation? Think about the colors, patterns, and motifs that are commonly associated with your chosen theme. By matching your embellishments to the overall theme, you’ll create a cohesive and visually appealing scrapbook page.
Match the Colors and Patterns
When it comes to choosing embellishments, it’s important to match the colors and patterns to your photos and background papers. Look for embellishments that complement or contrast nicely with the colors in your photos. If you’re using patterned papers as your background, select embellishments that have a similar color scheme or pattern to create a harmonious look.
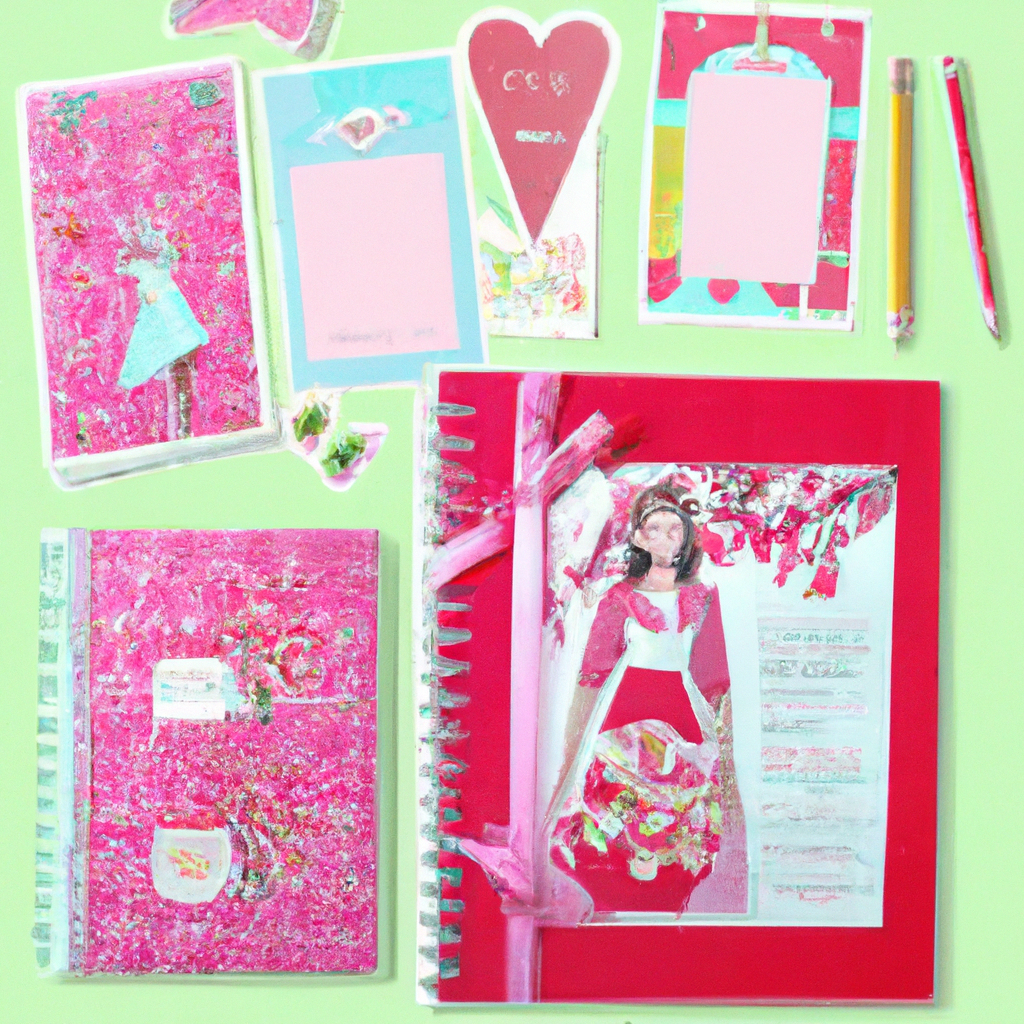
Mix and Match Different Types of Embellishments
To add depth and visual interest to your scrapbook pages, consider mixing and matching different types of embellishments. Combine stickers, die-cuts, ribbons, and brads to create a unique and layered look. Experiment with different textures and materials to create a tactile experience that will make your pages stand out.
Consider the Size and Placement of the Embellishments
When placing embellishments on your scrapbook pages, be mindful of their size and placement. Larger embellishments can serve as focal points and draw attention to specific areas of your layout. Smaller embellishments can be used to fill in gaps or add a finishing touch. Play around with different arrangements until you’re happy with the overall balance and composition of your page.
Using Stickers and Die-Cuts
Stickers and die-cuts are versatile embellishments that can add a lot of personality and charm to your scrapbook pages. Here are some creative ways to use them:
Use Stickers to Add Accents and Titles
Stickers are great for adding accents and titles to your scrapbook pages. Look for sticker sets that include a variety of shapes, letters, and designs. You can use them to highlight specific elements in your photos, label different sections of your page, or create a decorative border. Experiment with different sticker placements to find the look that suits your style.
Layer Die-Cuts for Dimension and Depth
Die-cuts are pre-made shapes that you can mix and match to create unique designs on your scrapbook pages. Layering die-cuts can add dimension and depth to your layouts. Start by selecting a base shape or design and then add smaller die-cuts on top. This technique can create a visually stunning effect and make your pages come alive.
Create Borders and Frames with Stickers and Die-Cuts
Stickers and die-cuts can also be used to create borders and frames on your scrapbook pages. Simply arrange them around the edges of your photos or as a decorative frame for your entire layout. This technique can help guide the viewer’s eye and add a polished and finished look to your pages.
Adding Texture with Ribbons and Fabrics
Adding texture to your scrapbook pages can make them more visually interesting and engaging. Ribbons and fabrics are versatile embellishments that can add a tactile and dimensional element to your designs. Here are some ways to incorporate them:
Create Ribbon Banners and Borders
Ribbons are perfect for creating banners and borders on your scrapbook pages. Cut the ribbons into different lengths and fold them to create a layered look. Use adhesive to secure them to your page, creating a whimsical and playful border. You can also create ribbon banners by cutting V-shaped notches into the ends of the ribbons and attaching them to your page at different angles.
Use Fabric Scraps for Unique Designs
Don’t limit yourself to just paper when it comes to creating your scrapbook layouts. Fabric scraps can add a unique and unexpected touch to your designs. Cut fabric into shapes or use it as a background for your photos. You can also use fabric as a base for your journaling or to create pockets and flaps for interactive elements.
Add Texture with Embroidered Ribbons
If you enjoy sewing or embroidery, consider incorporating embroidered ribbons into your scrapbook pages. Embroidered ribbons come in a variety of colors and patterns and can add a beautiful and delicate texture to your layouts. Use them as borders, accents, or even to create intricate designs that mimic lace.

Incorporating Photos in Unique Ways
Photographs are the heart of any scrapbook, and there are countless creative ways to incorporate them into your designs. Here are some ideas to get you started:
Create Interactive Photo Elements
Make your photos more interactive by incorporating elements that can be lifted, flipped, or turned. For example, you could create a flip-up section that reveals another photo underneath, or a sliding mechanism that moves your photos back and forth. Interactive photo elements not only add visual interest but also create a dynamic storytelling experience.
Make Photo Pockets and Flaps
Another way to incorporate photos into your scrapbook pages is by creating pockets and flaps. Cut out a section of your page and attach a clear plastic pocket or envelope to hold your photo. Alternatively, you can create flaps by attaching a folded piece of paper or cardstock to your page, revealing a hidden photo beneath. This technique adds an element of surprise and allows you to include more photos without overcrowding your layout.
Use Cutouts to Highlight Photos
Cutouts are an easy and effective way to draw attention to a specific photo on your scrapbook page. Cut a shape or design from cardstock or patterned paper and use it to frame your photo. You can also layer multiple cutouts to create a visually interesting effect. Experiment with different shapes and sizes to find the perfect cutout that enhances your photo and complements your layout.
Enhancing with Paints and Inks
Paints and inks are versatile tools that can add depth, texture, and personality to your scrapbook pages. Here are some ways to use them effectively:
Add Backgrounds and Texture with Paints
Paints can be used to create beautiful and unique backgrounds for your scrapbook pages. Apply acrylic or watercolor paints to your background paper, using brushes, sponges, or even your fingers to create different textures and effects. You can also use stencils, masks, or stamps to add patterns or designs.
Use Stamps and Inks for Patterns and Designs
Stamps and inks are great for adding patterns, designs, and even journaling to your scrapbook pages. Choose stamps that fit the theme or style of your layout and ink them up with your favorite colors. Stamp them directly onto your background paper or onto a separate piece of cardstock or vellum and then cut them out to create individual elements.
Create Watercolor Effects
Watercolor paints are a fantastic way to add soft and dreamy effects to your scrapbook pages. Use a wet brush and watercolor paints to create washes of color or subtle backgrounds. You can also use a dry brush to create texture or a technique called “wet-on-wet” to blend colors together. Watercolors can add a whimsical and artistic touch to your layouts.
Utilizing Embellishments for Journaling
Journaling is an important aspect of scrapbooking as it allows you to tell the story behind your photos. Embellishments can be used creatively to enhance your journaling. Here are some ideas:
Use Letter Stickers and Alphabets for Titles
Letter stickers and alphabets are perfect for creating titles and headings in your scrapbook pages. Look for different fonts and sizes that match the style of your layout. You can arrange them vertically, horizontally, or even in a curved shape to create a visually striking title. Experiment with different placements until you find the one that fits your design.
Create Interactive Journaling Cards
Make your journaling more interactive by creating journaling cards that can be pulled out or flipped open. Cut cardstock or patterned paper into small rectangles or shapes and write your journaling on them. Attach them to your page using brads or adhesive, leaving a portion accessible for easy reading or interaction.
Add Small Embellishments as Bullet Points
When journaling, consider using small embellishments such as brads, sequins, or enamel dots as bullet points. These can be placed next to important details or key points in your journaling, adding visual interest and guiding the reader’s eye. Experiment with different sizes and shapes to find the ones that complement your layout.
Incorporating Dimension with Embossing and Foiling
Embossing and foiling are techniques that can add dimension and elegance to your scrapbook pages. Here’s how to incorporate them effectively:
Emboss Designs for Raised Patterns
Embossing is a technique that creates raised patterns or designs on your scrapbook pages. You can use embossing folders or stamps to create the desired pattern, and then heat-emboss it using embossing powder and a heat gun. This technique adds texture and dimension to your layouts and can be especially effective for creating focal points or background patterns.
Add Gold or Silver Foil Accents
Foil accents can add a touch of glamour and sophistication to your scrapbook pages. Apply adhesive to your desired area, let it dry until it becomes tacky, and then press down a sheet of gold or silver foil. Gently peel away the foil to reveal a shiny and metallic accent. Foil accents can be used to highlight titles, borders, or specific elements on your layouts.
Create Dimensional Title Elements
Elevate your titles and headings by creating dimensional elements using embossing and foiling techniques. You can emboss your title using a coordinating stamp and embossing powder, or use adhesive and foil to create a metallic finish. These techniques will add depth and visual interest to your scrapbook pages, making your titles truly stand out.
Creating Unique Backgrounds
The background of your scrapbook pages sets the tone for your entire layout. Here are some ways to create unique backgrounds:
Use Patterned Papers and Cardstock
Patterned papers and cardstock are versatile options for creating interesting backgrounds. Choose papers with bold prints, subtle patterns, or simple designs that complement your photos and embellishments. Cut them into different shapes or sizes and layer them to create a visually appealing background. The combination of various patterns and colors can make your layout pop.
Create Mixed Media Backgrounds
Mixed media backgrounds incorporate a variety of materials and techniques, such as paints, inks, sprays, stencils, and even found objects. Apply paints or inks directly onto your background paper and then layer different textures, colors, and mediums on top. Use stencils and sprays to create unique designs and add interest to your layout. Mixed media backgrounds allow for endless creativity and experimentation.
Experiment with Washi Tapes
Washi tapes are decorative adhesive tapes that come in a wide range of colors, patterns, and widths. They can be easily torn or cut, making them perfect for adding borders, frames, or decorative elements to your scrapbook pages. Experiment with different combinations and placements to find the perfect look. Washi tapes are easy to remove and reposition, so don’t be afraid to try different designs until you’re satisfied.
Using Natural Elements
Incorporating natural elements into your scrapbook pages can add a touch of beauty and authenticity. Here are some ways to do it:
Press and Preserve Flowers and Leaves
Pressing and preserving flowers and leaves allows you to incorporate nature’s beauty into your scrapbook pages. Choose flowers and leaves that are meaningful to your story or that match your theme. Press them by placing them between the pages of a heavy book for a few weeks. Once dried, you can attach them to your layouts using adhesive or clear pockets.
Incorporate Shells and Sand from Beach Trips
If you have been on a beach trip or vacation, consider incorporating shells and sand into your scrapbook pages. Collect shells from the shoreline and sprinkle sand onto your layouts to recreate the seaside feel. You can place shells as accents, create borders using small shells, or even create a mini beach scene with sand and shells.
Use Twigs and Twines for Rustic Touches
For a rustic and nature-inspired touch, consider using twigs and twines in your scrapbook pages. Twigs can be used as photo corners or as dividers between sections. Twine can be wrapped around photo mats, used to tie tags or journaling cards, or even used to create unique shapes and designs. These natural elements add texture and organic charm to your layouts.
Adding Sparkle with Glitter and Sequins
A touch of sparkle can bring your scrapbook pages to life. Glitter and sequins are perfect for adding that extra pizzazz. Here are some ways to use them:
Apply Glitter to Borders and Accents
Glitter adds a joyful and sparkling touch to your scrapbook pages. Apply glue or adhesive to the edges of your photos, photo mats, or borders, and sprinkle glitter on top. You can also create glitter accents by outlining shapes or designs with glue and then adding glitter. Be mindful of not overdoing it, as a little glitter goes a long way.
Use Sequins to Mimic Starry Skies
Sequins are versatile embellishments that can mimic the look of starry skies on your scrapbook pages. Attach sequins to your layouts using adhesive or thread them onto a string or twine. You can create clusters of sequins to represent constellations or sprinkle them randomly across your page for a whimsical effect. Sequins add a playful and magical touch to your designs.
Create Glittery Title Fonts
Make your titles and headings stand out by adding a touch of glitter. Use glue or adhesive to write or trace your title onto your page, and then sprinkle glitter on top. You can also use glitter alphabets or stickers for a quick and easy glittery effect. Glittery title fonts add a touch of glamour and draw attention to the focal point of your layout.
With these creative ideas and techniques, you’ll be able to embellish your scrapbook pages like a pro. Remember to have fun and let your creativity shine through. Happy scrapbooking!