
Get ready to take your scrapbook pages to the next level with “Embellishing Your Scrapbook Pages: A Comprehensive Guide.” In this detailed article, you’ll discover a variety of creative and exciting ways to enhance your scrapbook pages with stunning embellishments. From stickers and die-cuts to ribbons and brads, you’ll explore a world of possibilities to make your scrapbook truly unique. Gain inspiration and learn different techniques to effectively utilize these embellishments, turning your pages into works of art that capture your precious memories beautifully. Get ready to let your creativity soar as you delve into the world of scrapbook embellishments!


Choosing the Right Embellishments
When it comes to scrapbooking, choosing the right embellishments is crucial in bringing your pages to life. The embellishments you choose should complement your overall theme, add visual interest, and enhance the story you’re telling through your scrapbook. Here are a few key considerations to keep in mind when selecting your embellishments.
Understanding Your Scrapbook Theme
Before you start adding embellishments to your pages, it’s important to have a clear understanding of your scrapbook theme. Whether you’re documenting a vacation, a special event, or everyday moments, your theme will guide your embellishment choices. For example, if your theme is a beach vacation, you may opt for seashell stickers, beach-themed die-cuts, and ribbons in shades of blue to evoke the feeling of sand and sea.
Considering the Size and Shape
When selecting embellishments, consider the size and shape of your scrapbook pages. If you have a smaller album or limited space, it’s best to choose smaller embellishments that won’t overpower the layout. On the other hand, if you have a larger album or want to create a focal point, larger embellishments can make a bold statement. Play around with different sizes and shapes to find the perfect balance for your pages.
Matching Colors and Patterns
Another important consideration when choosing embellishments is matching colors and patterns. Take a look at your photos and base papers to identify the predominant colors and patterns. Then, select embellishments that complement and enhance those colors and patterns. This will create a cohesive and visually pleasing layout. For example, if you have photos with vibrant reds and yellows, you may choose embellishments in similar warm tones to create a harmonious composition.
Mixing Different Textures
Embellishments don’t just add visual interest, they can also add texture to your scrapbook pages. Consider incorporating different textures to create a multi-dimensional and tactile experience. For example, you can mix stickers with raised designs, fabric ribbons, or buttons with intricate details. Experiment with different textures to see how they can enhance the overall look and feel of your scrapbook pages.
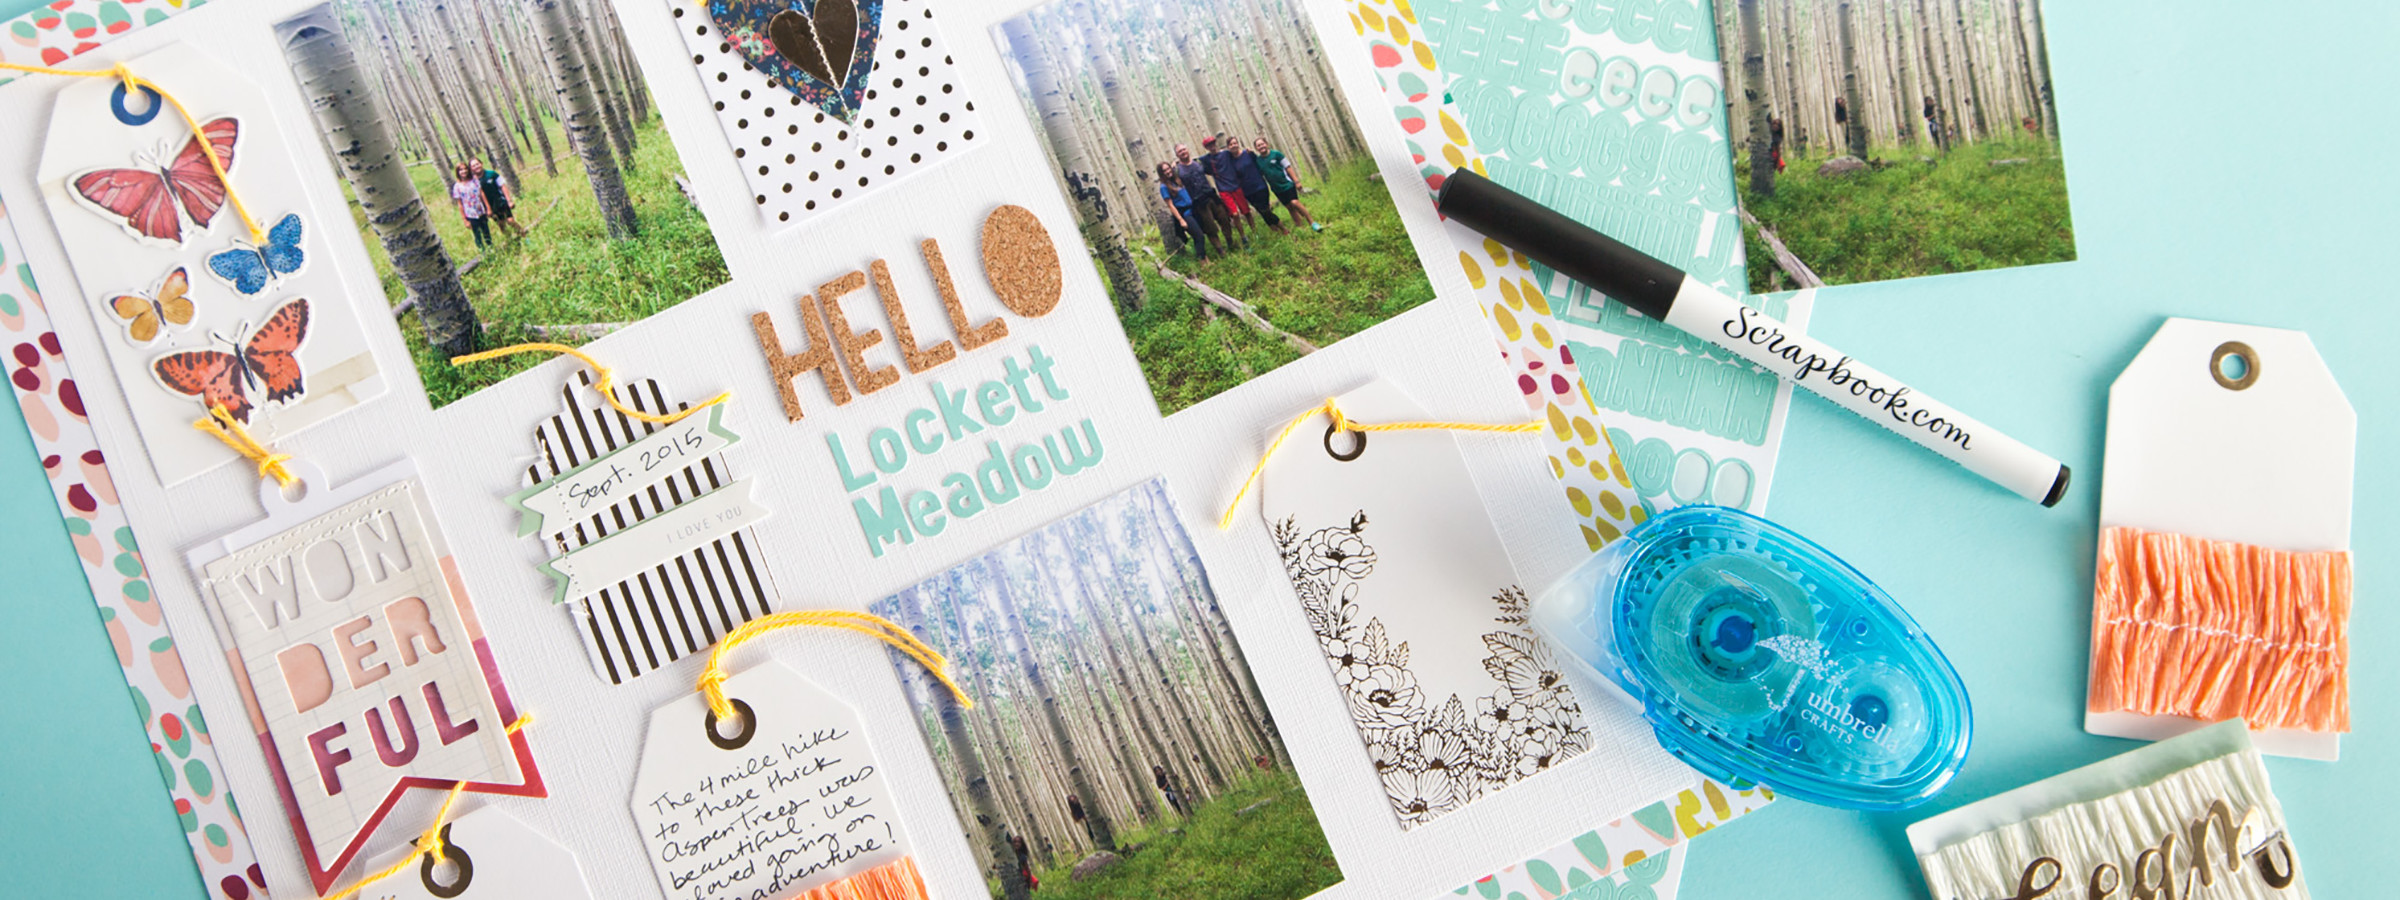
Stickers and Die-Cuts
Stickers and die-cuts are a popular choice for scrapbookers looking to add quick and easy embellishments to their pages. They come in a wide variety of designs, themes, and sizes, making it easy to find the perfect ones to complement your layout.
Exploring Different Sticker Options
Stickers can be a great way to add pops of color, images, and even sentiments to your scrapbook pages. From themed stickers like animals, flowers, or travel icons to alphabet stickers for titles and journaling, the options are virtually endless. Consider the overall theme of your scrapbook and choose stickers that align with that theme. You can also mix and match different sticker styles to create a unique and personalized look.
Using Die-Cuts to Add Dimension
Die-cuts are pre-cut paper shapes or designs that can be easily adhered to your scrapbook pages. They are often made from patterned or textured paper and can add dimension to your layouts. Die-cuts come in a wide range of designs, including flowers, frames, borders, and more. To make your die-cuts stand out, consider using foam adhesive or dimensional adhesive to create layers and shadow effects.
Creating a Focal Point with Stickers
Stickers can be a great way to create a focal point on your scrapbook pages. Choose a large, eye-catching sticker and place it strategically on your layout to draw attention to a particular photo or detail. This can help guide the viewer’s eye and bring a sense of focus and emphasis to your page. Experiment with different placement options until you find the perfect spot for your focal point sticker.
Layering Stickers and Die-Cuts
For added visual interest, consider layering stickers and die-cuts on your scrapbook pages. This technique allows you to create depth and dimension in your layouts. Start by adhering larger stickers or die-cuts to your page as a base, and then layer smaller stickers or die-cuts on top. Play around with different combinations and placements to find the right balance for your design.

Ribbons and Fabric
Ribbons and fabric can add a touch of softness and texture to your scrapbook pages. They can be used to create borders, accents, or even pockets to hold memorabilia or extra photos. Here are a few ideas on how to incorporate ribbons and fabric into your layouts.
Different Types of Ribbons and Fabrics
Ribbons come in a variety of materials, widths, and patterns. From satin and grosgrain to lace and burlap, the possibilities are endless. Consider the theme and style of your scrapbook and choose ribbons that complement that aesthetic. Fabrics, on the other hand, can be used as backgrounds, borders, or even cut into shapes and adhered to your pages. Choose fabrics that add depth and interest to your layouts, such as textured or patterned fabrics.
Adding Ribbon Borders and Accents
One simple way to incorporate ribbons into your scrapbook pages is by using them as borders or accents. Cut strips of ribbon to the desired length and adhere them to the edges of your pages for a polished and finished look. You can also create ribbon accents by tying bows, creating loops, or layering ribbons in different directions. Be creative and experiment with different ribbon placements to find the perfect addition to your layouts.
Creating Fabric Pockets and Tags
Fabric can be an excellent choice for creating pockets or tags to hold additional photos, journaling cards, or memorabilia. Cut a piece of fabric to the desired size, fold it in half, and adhere the sides to your page, leaving the top open. This will create a pocket that can hold your chosen items. You can also cut fabric into tag shapes, fold and adhere the top to create a tag, and then write or stamp your desired message. Fabric pockets and tags not only add functionality but also bring an element of charm and texture to your scrapbook pages.
Using Ribbons and Fabric for Texture
In addition to adding visual interest, ribbons and fabric can also add texture to your layouts. Their softness and tactile qualities can create a tactile experience for the viewer. Experiment with different ways to incorporate ribbons and fabric into your pages, such as weaving ribbons through die-cuts, layering fabric pieces for a textured background, or using fabric as a mat for your photos. The combination of different textures can elevate the overall look and feel of your scrapbook pages.
Brads and Eyelets
Brads and eyelets are small metal embellishments that can add a touch of sophistication and functionality to your scrapbook pages. They are versatile and can be used in various ways to enhance your layouts. Here are a few ideas on how to incorporate brads and eyelets into your designs.
Enhancing Scrapbook Layouts with Brads
Brads can be used to enhance the overall design and visual appeal of your scrapbook layouts. They come in various shapes, sizes, and colors, allowing you to customize them based on your theme or personal preferences. Brads can be used as decorative elements on their own or as functional anchors to hold elements like tags, ribbons, or even photos. Experiment with different placement options to find the perfect spot for your brads.
Creating Interactive Elements with Eyelets
Eyelets can add an interactive element to your scrapbook pages. They are often used to reinforce holes for binding or to create a movable element, such as a swing or flap. To use eyelets, punch a hole where you want to place the eyelet, insert the eyelet, and use an eyelet setter or hammer to secure it in place. Eyelets can be combined with ribbons, twine, or brads to create interactive features that engage the viewer and add a unique touch to your pages.
Using Brads and Eyelets as Anchors
Brads and eyelets can also serve as functional anchors in your scrapbook layouts. For example, you can use brads to secure tags or journaling cards to your pages, ensuring that they stay in place even with frequent flipping. Eyelets can be used to reinforce holes in pages or create sturdy attachment points for elements like ribbons or tags. Incorporating brads and eyelets as anchors not only adds functionality but also adds a polished and finished look to your scrapbook pages.
Combining Brads and Eyelets in Clusters
For added visual interest, consider combining brads and eyelets in clusters on your scrapbook pages. This technique allows you to create focal points or decorative elements that catch the viewer’s eye. Start by grouping brads and eyelets of different sizes and colors, and then adhere them in a cohesive and strategic manner. Clusters can be used around photos, titles, journaling, or as standalone design elements. Play around with different arrangements until you find a cluster that enhances your overall layout.

Buttons and Charms
Buttons and charms are delightful embellishments that can add a touch of whimsy and personality to your scrapbook pages. From different button styles to charming trinkets, here are a few ideas on how to incorporate buttons and charms into your designs.
Exploring Different Button Styles
Buttons come in a wide variety of styles, shapes, sizes, and colors, making them versatile embellishments for your scrapbook pages. From plain and simple round buttons to decorative buttons with unique designs, there’s a button for every theme and aesthetic. Consider choosing buttons that match the colors and style of your photos or use them to add a pop of contrast and visual interest. You can adhere buttons to your pages individually or use them to create patterns, borders, or even button clusters.
Adding Charm with Embellishments
Charms are small trinkets or metal embellishments that can add charm and personality to your scrapbook pages. They often come in various shapes, such as hearts, keys, animals, or symbols, allowing you to find the perfect charm to suit your theme or story. Charms can be easily attached to your pages using adhesive or by using jump rings or small chains. Consider incorporating charms into your layouts as decorative elements, to highlight a specific detail, or to add a personalized touch.
Creating Button Clusters for Interest
Button clusters are a fun and creative way to add visual interest and dimension to your scrapbook layouts. To create a button cluster, gather buttons of different sizes, colors, and styles, and arrange them in a visually appealing manner. You can overlap buttons, layer them, or vary the sizes to create depth. Button clusters can be used around photos, titles, or journaling, or as standalone design elements. Have fun experimenting with different button combinations and placements to find the perfect cluster for your pages.
Incorporating Charms into Scrapbook Pages
Charms can also be incorporated into your scrapbook pages in various ways. They can be attached to ribbons, twine, or chains to create interactive features, or they can be adhered directly to your layouts as decorative elements. Charms can act as embellishments for tags, bookmarks, or even as part of a charm bracelet theme. Consider the overall style and theme of your scrapbook and use charms to add a touch of whimsy or personalization to your pages.
Rhinestones and Sequins
If you’re looking to add a touch of glamour and sparkle to your scrapbook pages, rhinestones and sequins are the perfect embellishments for you. Whether you want to create a dazzling effect, add shimmer and shine, or highlight specific elements, rhinestones and sequins can do the trick.
Creating Sparkling Effects with Rhinestones
Rhinestones are small adhesive gems that can add a sparkling effect to your scrapbook pages. They come in various colors, sizes, and shapes, allowing you to customize them based on your theme or design. Rhinestones can be used to highlight important elements, such as titles or photos, or to add clusters of sparkle throughout your layouts. Experiment with different placements and patterns to create a dazzling effect that catches the light and draws the viewer’s eye.
Using Sequins for Shimmer and Shine
Sequins are another great way to add shimmer and shine to your scrapbook pages. They are flat, round, and lightweight, making them easy to adhere to your layouts. Sequins often come in various metallic or iridescent finishes, allowing you to choose the perfect ones to match your theme or aesthetic. You can use sequins as standalone embellishments or create patterns and clusters for added visual interest. The reflective properties of sequins can create a playful and lively effect on your pages.
Adding Rhinestones and Sequins to Titles
One creative way to incorporate rhinestones and sequins into your scrapbook pages is by adding them to your titles. Whether you’re using alphabet stickers, die-cuts, or hand-cut letters, embellishing your titles with rhinestones and sequins can add a touch of glamour and draw attention to your headlines. You can adhere small rhinestones or sequins on individual letters or create patterns and clusters around your title. This technique not only adds visual interest but also elevates the overall look and feel of your scrapbook pages.
Incorporating Rhinestones and Sequins in Borders
Rhinestones and sequins can also be used to create borders or frames on your scrapbook pages. They can add a touch of elegance and make your photos or journaling standout. Whether you opt for a simple and straight line border or a more intricate and ornate design, rhinestones and sequins can bring a sense of luxury and sophistication to your layouts. Experiment with different patterns, colors, and placements to find the border style that best suits your scrapbook theme.

Rubber Stamps and Ink
Rubber stamps and ink are classic embellishments that can add personality, interest, and creativity to your scrapbook pages. They allow you to incorporate intricate designs, create backgrounds, and personalize your layouts. Here’s a closer look at how you can use rubber stamps and different types of ink to enhance your scrapbook pages.
Choosing the Right Rubber Stamps
When it comes to choosing rubber stamps, the options are endless. From whimsical images and quotes to intricate patterns and textures, there’s a stamp for every theme and style. Consider the overall tone and aesthetic of your scrapbook pages and select stamps that align with that vision. Whether you prefer clear stamps, cling stamps, or wood-mounted stamps, be sure to choose a stamp that you find comfortable to use and produces crisp, clean images.
Using Different Ink Types for Stamping
In addition to choosing the right stamps, selecting the right type of ink is crucial to achieve the desired effect on your scrapbook pages. There are various types of ink available, each with its own properties and finishes. Pigment ink is great for heat embossing and provides a rich, opaque color. Dye ink dries quickly and is perfect for stamping images and sentiments. Hybrid ink combines the best of both worlds with quick-drying properties and vibrant colors. Experiment with different ink types to find the one that works best for your stamping projects.
Stamping as Background Decoration
Stamping can be a creative way to add background decoration to your scrapbook pages. Use patterned stamps to create a subtle or bold backdrop for your photos, titles, or journaling. Repeat a stamp image in a row or create a pattern with multiple stamped images. Stamping can also be used to create borders or frames around your layouts. This technique adds visual interest and texture to your backgrounds, making your scrapbook pages more visually appealing.
Combining Rubber Stamps and Embellishments
Rubber stamps can be seamlessly incorporated with other embellishments on your scrapbook pages. The combination of stamped images with stickers, die-cuts, or even paper flowers can create a cohesive and layered look. For example, stamp a floral image and then adhere a matching die-cut flower on top for added dimension. Stamp sentiments or quotes and then embellish them with rhinestones or sequins. The possibilities are endless when it comes to combining rubber stamps with other embellishments, allowing you to truly customize your scrapbook pages.
Handmade Embellishments
Handmade embellishments add a personal touch and unique flair to your scrapbook pages. They allow you to showcase your creativity and create one-of-a-kind elements that can’t be found in a store. Here are a few ideas on how to create your own handmade embellishments.
Creating Custom Paper Flowers
Paper flowers are a popular choice for handmade embellishments in scrapbooking. Whether you prefer simple rolled flowers, intricate layered flowers, or even quilled flowers, there are countless tutorials and techniques available to help you create beautiful blooms. Experiment with different paper types, colors, and sizes to match your scrapbook theme. Use brads, buttons, or rhinestones as centers for added visual interest. Handmade paper flowers can add a touch of whimsy and elegance to your layouts.
Making Unique Embellishments with Punches
Punches are versatile tools that can help you create unique embellishments for your scrapbook pages. From decorative corners and borders to shapes and designs, punches allow you to easily cut out various elements from patterned or solid colored paper. Consider using different punches to create custom tags, banners, frames, or even confetti. Punches can add an extra touch of sophistication and playfulness to your scrapbook pages.
Incorporating Origami Elements
Origami, the art of paper folding, can be a fun and creative way to add unique elements to your scrapbook pages. From simple origami shapes like hearts, stars, or boxes to more complex designs like animals or flowers, origami can bring a sense of whimsy and charm to your layouts. Consider using origami elements as standalone embellishments or combine them with other elements like ribbons, buttons, or brads for added visual interest. Origami elements can help tell a specific story and add a playful touch to your scrapbook pages.
Crafting Personalized Tags and Labels
Handmade tags and labels are versatile embellishments that can be used in various ways on your scrapbook pages. They can be used to label photos, highlight important details, or add journaling to your layouts. Create custom tags by cutting out desired shapes from patterned or solid colored paper. Add journaling or sentiments with rubber stamps or handwritten notes. Consider adding ribbons, twine, or brads to your tags for added dimension and interest. Handmade tags and labels not only add a personal touch but also provide a practical aspect to your scrapbook pages.

Adding Texture with Embellishments
Texture can instantly elevate your scrapbook pages and add a tactile experience for the viewer. Embellishments can play a key role in creating texture and adding depth to your layouts. Here are a few ideas on how to add texture with embellishments.
Using Embossed Papers
Embossed papers have raised patterns or designs that can add texture and dimension to your scrapbook pages. Consider using embossed papers as backgrounds, borders, or even as accents on specific elements such as titles or photos. Experiment with different embossed patterns, such as floral, geometric, or abstract designs, to find the perfect match for your scrapbook theme. Embossed papers can add visual interest and an extra layer of sophistication to your layouts.
Creating Textured Backgrounds
Embellishments can be used to create textured backgrounds for your scrapbook pages. Consider using materials such as textured cardstock, fabric, or even specialty papers like vellum or cork. Layer these materials to create a tactile experience and visually interesting backgrounds. You can also use techniques like tearing, crumpling, or distressing to add texture and dimension to your backgrounds. Textured backgrounds can create a visually appealing and dynamic backdrop for your photos and journaling.
Adding Dimension with Foam Tape
Foam tape is a versatile adhesive that can help add dimension to your embellishments. Whether you’re adhering stickers, die-cuts, or even photos, foam tape lifts them off the page, creating a layered and three-dimensional effect. Use foam tape to elevate certain elements and create a sense of depth in your layouts. You can layer multiple elements with foam tape to add even more dimension. Foam tape is a simple yet effective way to make your embellishments pop and bring a sense of depth to your scrapbook pages.
Exploring Different Texture Techniques
Besides using specific textured embellishments, consider exploring different texture techniques to further elevate your scrapbook pages. Techniques like heat embossing, dry embossing, or texture paste can add unique textures and designs to your layouts. Heat embossing involves using embossing powder and a heat gun to create a raised and glossy effect. Dry embossing uses embossing folders and a die-cutting machine to create raised designs on paper. Texture paste can be applied through stencils to create raised patterns and textures. These techniques allow you to add intricate and eye-catching textures to your scrapbook pages.
Creative Techniques for Embellishments
Embellishments offer endless creative possibilities for your scrapbook pages. Here are a few techniques to consider incorporating into your designs.
Embellishing Title and Journaling
Titles and journaling are key elements in any scrapbook page, and adding embellishments to them can make them stand out even more. Consider using stickers, die-cuts, or even stamped images to accentuate the main title or create decorative headers for your journaling. Embellishments can draw attention to these important details and make them visually appealing.
Adding Hidden Elements for Surprise
Adding hidden elements to your scrapbook pages can create an element of surprise and interactivity for the viewer. Consider using flaps, pockets, or envelopes to conceal additional photos, journaling, or memorabilia. This not only adds an element of surprise but also allows you to include extra details without overwhelming the overall design. You can use stickers, die-cuts, or patterned paper to create these hidden elements.
Layering and Collaging Embellishments
Layering and collaging embellishments can add depth, interest, and a sense of playfulness to your scrapbook pages. Start by layering different elements, such as stickers, die-cuts, or paper shapes. Experiment with different placements, directions, and sizes to create a visually dynamic composition. You can also create collages by combining various embellishments and adhering them together. Layering and collaging embellishments allows you to create a visually rich and aesthetically pleasing layout.
Mixing Different Embellishment Types
Don’t be afraid to mix and match different types of embellishments on your scrapbook pages. Combining stickers with brads, ribbon with sequins, or fabric with buttons can create an eclectic and visually interesting composition. The key is to find a balance between different embellishments and ensure they work cohesively to enhance the overall design. Be open to experimentation and have fun exploring the possibilities of combining different types of embellishments on your layouts.
In conclusion, embellishments are the icing on the cake when it comes to scrapbooking. They allow you to personalize, enhance, and elevate your scrapbook pages, bringing your stories to life. From stickers and die-cuts to ribbons and fabric, brads and eyelets to buttons and charms, rhinestones and sequins to rubber stamps and ink, there are countless options and techniques to explore. Remember to choose embellishments that suit your theme, consider size and shape, match colors and patterns, and mix different textures. Get creative, experiment with different techniques, and have fun embellishing your scrapbook pages. Let your imagination and personal style shine through, and you’ll create layouts that are truly unique and memorable. Happy embellishing!