
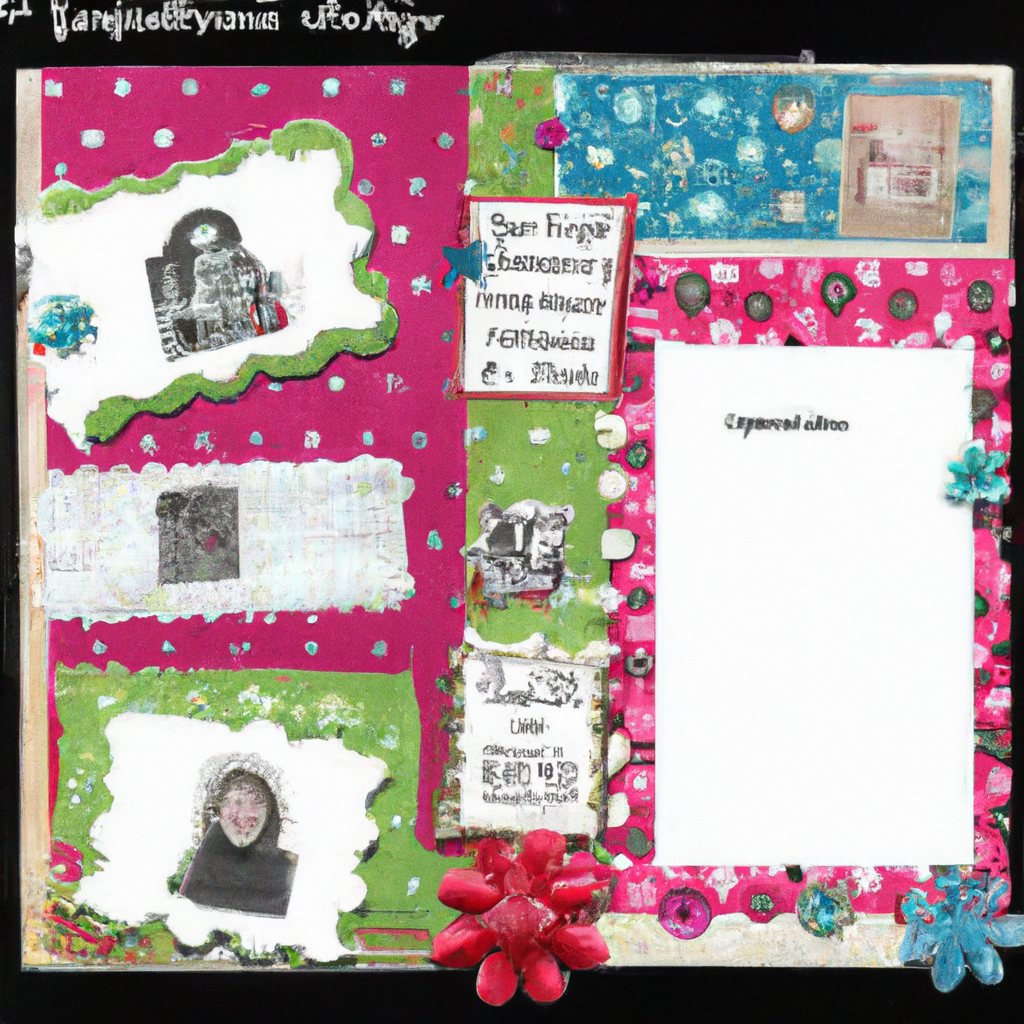
In “Experiment with Different Embellishments for Stunning Scrapbook Pages,” discover an exciting world of creativity as you explore various embellishment options for your scrapbook pages. From stickers and die-cuts to ribbons and brads, this article serves as a guide to help you make your scrapbook pages truly stunning. Learn creative techniques and tips on how to use these embellishments effectively, transforming your memories into beautiful works of art. So, grab your scrapbook and let’s embark on a journey of imagination and inspiration!


1. Stickers
Stickers are a versatile and fun way to add visual interest to your scrapbook pages. They come in a wide variety of shapes, sizes, and designs, making them suitable for any theme or style.
1.1. Types of Stickers
There are several types of stickers that you can choose from to enhance your scrapbook pages. Flat stickers are the most common type and are typically made of paper or cardstock. They can feature various designs, including flowers, animals, letters, and more. Dimensional stickers are another popular option, as they add depth and texture to your layouts. These stickers are typically made of foam or other materials that raise them off the page. Additionally, alphabets stickers are a fantastic choice for adding titles or captions to your pages, as they come in a wide range of fonts and sizes.
1.2. Creative Ways to Use Stickers
Stickers offer endless creative possibilities when it comes to scrapbooking. Here are a few ideas to inspire you:
-
Create borders: Use a row of stickers along the edges of your pages to create a decorative border. Mix and match different designs for added interest.
-
Embellish photos: Place stickers directly onto your photos to add a touch of whimsy or highlight certain details. For example, you can add a sticker of a heart to emphasize a couple in a photograph.
-
Build scenes: Use stickers to create a scene on your page. For instance, if your layout features a beach theme, combine stickers of palm trees, seashells, and waves to form a tropical scene.
-
Design your own patterned paper: Arrange stickers in a repetitive pattern to create your own unique background paper. This technique is particularly useful if you do not have a specific patterned paper that matches your theme.
1.3. Tips for Choosing and Placing Stickers
When selecting stickers for your scrapbook pages, consider the following tips:
-
Theme and color coordination: Choose stickers that complement your page’s theme and color scheme. If you’re creating a nature-inspired layout, opt for stickers with floral or botanical motifs.
-
Stick to the adhesive: Ensure that the adhesive on the back of the stickers is strong enough to hold them securely to your page. Test a small area before committing to placing them.
-
Placement for balance: When placing stickers, consider the overall balance of your page. Distribute them evenly throughout the layout to create visual harmony.
-
Overlap for depth: Experiment with overlapping stickers to create dimension and depth. This technique can add visual interest to an otherwise flat design.
2. Die-Cuts
Die-cuts are another captivating embellishment option that can take your scrapbook pages to the next level. These intricate cut-outs come in a wide variety of shapes, patterns, and materials, allowing you to easily incorporate them into your layouts.
2.1. Different Types of Die-Cuts
There are many types of die-cuts available, each offering its own unique design possibilities. Here are a few popular options:
-
Paper die-cuts: These are the most common type of die-cuts and are typically made of cardstock or patterned paper. They come in various shapes and sizes, including flowers, hearts, stars, and more.
-
Chipboard die-cuts: Made from thicker and sturdier material, chipboard die-cuts provide a more substantial and dimensional effect to your scrapbook pages. They are perfect for adding a pop of texture and depth.
-
Acrylic die-cuts: Acrylic die-cuts are transparent and add a modern and sleek touch to your layouts. They can be layered on top of other elements to create interesting visual effects.
2.2. Incorporating Die-Cuts into Scrapbook Layouts
Here are some creative ways to incorporate die-cuts into your scrapbook pages:
-
Background accents: Use large die-cut shapes to create a focal point on your page. For example, you can place a large flower or star die-cut behind your photos to draw attention to them.
-
Borders and frames: Use die-cut borders or frames around your photos or journaling to add a decorative touch. These can be simple or intricate, depending on the overall style of your layout.
-
Layering and stacking: Experiment with layering different die-cut shapes and sizes to create depth and dimension. Play with different colors and patterns to achieve the desired effect.
2.3. Creating Custom Die-Cuts
If you want to take your creativity a step further, consider creating your own custom die-cuts. Here’s how you can do it:
-
Manual die-cutting machines: Invest in a manual die-cutting machine, such as a Cuttlebug or Big Shot, to cut out your own designs. These machines work by pressing a metal die onto various materials, including paper, cardstock, and fabric.
-
Electronic cutting machines: Alternatively, you can use electronic cutting machines, such as a Cricut or Silhouette, to create custom die-cuts. These machines use digital files to cut out intricate designs with precision.
-
Templates and stencils: If you prefer a more hands-on approach, you can create your own templates or stencils and trace them onto your chosen material. Then, cut out the designs using scissors or craft knives.
Remember to have fun and experiment with different materials and designs to create unique die-cut embellishments for your scrapbook pages.
3. Ribbons and Trims
Ribbons and trims are classic embellishments that add elegance and texture to your scrapbook pages. They come in a wide array of colors, patterns, and widths, allowing you to customize your layouts according to your preferences.
3.1. Types of Ribbons and Trims
There are various types of ribbons and trims that you can incorporate into your scrapbook designs. Here are a few to consider:
-
Satin ribbons: Satin ribbons are smooth and shiny, adding a touch of sophistication to your layouts. They are especially popular for wedding and formal event scrapbook pages.
-
Grosgrain ribbons: Grosgrain ribbons have a ribbed texture and are known for their durability. They are ideal for adding a more casual and playful feel to your designs.
-
Lace trims: Lace trims offer a delicate and romantic touch to your scrapbook pages. They are perfect for vintage-inspired layouts or when you want to add a feminine flair.
-
Ricrac trims: Ricrac trims are wavy and zigzag-shaped, adding a whimsical and fun element to your pages. They are great for children’s layouts or when you want to create a playful theme.
3.2. Techniques for Using Ribbons and Trims
Here are some techniques to help you effectively incorporate ribbons and trims into your scrapbook designs:
-
Borders and edges: Use ribbons to create borders or edges on your page. You can either adhere them directly to the paper or weave them through slits or punched holes.
-
Bows and knots: Tie ribbons into bows or knots and place them strategically on your page. They can be used to visually anchor elements or add a decorative touch.
-
Photo corners: Create photo corners using ribbons or trims to add a stylish frame to your photos. Simply cut the ribbon into four equal pieces and adhere each piece to the corners of your photo.
3.3. Enhancing Layouts with Ribbon Embellishments
To enhance your layouts with ribbon embellishments, consider the following tips:
-
Size and width: Choose ribbons of different sizes and widths to add visual interest to your designs. For example, a thin ribbon can be used as a delicate accent, while a wider ribbon can serve as a bold border or background element.
-
Color coordination: Pay attention to the color scheme of your page and select ribbons that complement it. You can either match the colors or choose contrasting shades for a more dramatic effect.
-
Layering and combining: Experiment with layering ribbons of different colors and textures to create unique combinations. This technique adds depth and dimension to your layouts.
-
Adhesive options: Use adhesive dots, double-sided tape, or glue to secure ribbons to your page. Make sure the adhesive is strong enough to hold the ribbons securely, especially if they are being used to hold elements in place.
By incorporating ribbons and trims into your scrapbook pages, you can add a touch of elegance and texture that will take your designs to the next level.

4. Brads and Eyelets
Brads and eyelets are small metal embellishments that can add a touch of sophistication and functionality to your scrapbook pages. They come in various shapes, sizes, and finishes, making them versatile embellishments for a wide range of styles.
4.1. Exploring Brads and Eyelets
Brads and eyelets are similar in nature, but they serve slightly different purposes. Brads are decorative fasteners that have two prongs on the back, allowing them to be easily inserted through paper or other materials. Eyelets, on the other hand, are small metal rings that are set into holes punched through the paper. They provide reinforcement and can be used to attach tags, ribbons, or other elements to your layouts.
4.2. Design Ideas for Brads and Eyelets
Here are a few design ideas to inspire you in using brads and eyelets in your scrapbook pages:
-
Framing photos: Use brads or eyelets to create a decorative frame around your photos. Choose a color that complements your theme or opt for metallic finishes for a touch of elegance.
-
Attaching elements: Use brads or eyelets to attach elements such as tags, ribbons, or vellum overlays to your layouts. This provides a visually appealing way to secure these elements while adding a unique design element.
-
Adding movement: Create interactive elements on your page by using brads. For example, attach a hidden flap or pull-out tab using brads to reveal additional photos or journaling.
4.3. Attaching Brads and Eyelets
Attaching brads and eyelets to your scrapbook pages is relatively simple. Here’s how you can do it:
-
For brads: Use a paper piercer or craft knife to create a small hole where you want to insert the brad. Place the brad through the hole and bend the prongs on the back to secure it in place.
-
For eyelets: Use a hole punch or eyelet setter to create a hole in the paper or cardstock. Insert the eyelet into the hole and use the eyelet setter to crimp and secure it. This process typically requires a hammer or specific tools designed for eyelet setting.
Remember to carefully plan the placement of your brads and eyelets before inserting them into your page to ensure that they enhance your design and do not interfere with any photos or important elements.
5. Buttons and Charms
Buttons and charms are delightful embellishments that can add charm and character to your scrapbook pages. They come in a wide variety of styles, materials, and designs, allowing you to personalize your layouts according to your preferences.
5.1. Types of Buttons and Charms for Scrapbooking
There is an abundance of buttons and charms available, ranging from whimsical to elegant. Here are a few types you can incorporate into your scrapbook design:
-
Decorative buttons: Decorative buttons come in various shapes, colors, and sizes. They can feature designs, such as flowers, animals, or geometric patterns, and can add an interesting focal point to your layouts.
-
Vintage buttons: Vintage buttons can add a touch of nostalgia and elegance to your pages. Look for buttons with intricate designs, such as filigree, or those made from unique materials, such as Bakelite or mother-of-pearl.
-
Charms: Charms are small metal or plastic embellishments that can be attached to your pages. They can represent various themes, such as travel, hobbies, or special occasions, and add a personal touch to your layouts.
5.2. Incorporating Buttons and Charms into Layouts
Here are some ideas for incorporating buttons and charms into your scrapbook pages:
-
Button borders: Create a border or frame using buttons of the same color or different colors. This adds a whimsical touch to your design and draws attention to your focal point.
-
Button rain: Adhere buttons to your page in a scattered or cascading pattern, giving the illusion of a button rain. This adds movement and visual interest to your layout.
-
Charm clusters: Create clusters of charms around photos or journaling blocks. You can attach them using jump rings or small pieces of thread or ribbon. This technique adds a dimensional and personalized touch to your pages.
5.3. Adding Dimension and Texture with Buttons and Charms
To add dimension and texture to your scrapbook pages, try the following techniques when using buttons and charms:
-
Layering buttons: Layer buttons of different sizes and colors for a textured effect. Be sure to use adhesive foam dots or tape to raise the buttons off the page and create depth.
-
Mixing materials: Combine buttons and charms made from different materials, such as metal, wood, or enamel, to add visual interest and tactile appeal to your layouts.
-
Ink or paint accents: Add further visual interest to your buttons and charms by lightly brushing them with ink or paint to highlight their texture or add a distressed look.
By incorporating buttons and charms into your scrapbook pages, you can add a whimsical and personalized touch that will make your designs truly unique.
6. Washi Tape
Washi tape is a versatile and decorative adhesive tape that comes in a wide range of colors, patterns, and widths. It is made from natural fibers, such as bamboo or hemp, and offers a unique and fun way to add color and pattern to your scrapbook pages.
6.1. Introduction to Washi Tape
Washi tape originated in Japan and has become increasingly popular in the world of scrapbooking and paper crafting. It is known for its semi-transparency, repositionable nature, and ease of use. Washi tape is available in various designs, including florals, geometrics, polka dots, and more, making it a versatile and eye-catching embellishment.
6.2. Creative Uses of Washi Tape in Scrapbooking
Here are some creative ways to incorporate washi tape into your scrapbook pages:
-
Borders and frames: Use washi tape to create decorative borders or frames around your photos, journaling blocks, or entire pages. Mix and match different patterns and colors for a vibrant and eclectic look.
-
Background patterns: Apply strips of washi tape in a repetitive pattern to create your own unique background paper. This is a great technique if you don’t have a specific patterned paper that matches your theme.
-
Flags and banners: Cut small pieces of washi tape into flag or banner shapes and adhere them to toothpicks or miniature skewers. This creates cute and dimensional embellishments that you can place throughout your layouts.
6.3. Techniques for Incorporating Washi Tape into Layouts
Consider the following techniques when incorporating washi tape into your scrapbook pages:
-
Tearing or cutting: Experiment with tearing or cutting washi tape to achieve different effects. Torn edges can add a soft and shabby-chic look, while precise cuts can create clean lines and sharp angles.
-
Layering and overlapping: Layer different widths and patterns of washi tape to create a unique and textured look. Overlapping the tape can add depth and visual interest to your designs.
-
Fussy cutting: Some washi tapes have intricate patterns that can be fussy cut with scissors or craft knives. Cut out specific shapes or designs to use as standalone embellishments or accents on your pages.
Remember to have fun and be creative with washi tape. Its versatility and ease of use make it a fantastic addition to any scrapbook page.
7. Stencils and Masks
Stencils and masks are fantastic tools for adding intricate and repetitive designs to your scrapbook pages. They allow you to achieve intricate patterns, textures, and backgrounds with ease.
7.1. Utilizing Stencils and Masks
Stencils and masks are available in various designs, including geometric shapes, floral motifs, and abstract patterns. You can use them with various mediums, such as ink, paint, or texture paste, to create unique and eye-catching designs.
Here are some techniques for utilizing stencils and masks in your scrapbook pages:
-
Background designs: Position a stencil or mask onto your page and apply ink or paint through the openings using a sponge or blending tool. This creates a beautiful and intricate background design.
-
Focal points: Use stencils or masks to create focal points on your layouts. Apply paint or ink through the openings to highlight certain elements or draw attention to specific areas of your page.
-
Texture effects: Apply texture paste through a stencil or mask to create dimensional and tactile effects on your scrapbook pages. Once dry, you can leave it as is or add color using ink or paint.
7.2. Techniques for Creating Backgrounds with Stencils
Creating backgrounds with stencils can add depth and interest to your scrapbook pages. Here are a few techniques to try:
-
Ink blending: Apply ink to the stencil using a foam blending tool, gently making circular motions until you achieve the desired color intensity. This technique works well with both dye and pigment inks.
-
Spray mists or sprays: Lightly mist or spray ink or paint over the stencil to create a softer and more diffused background. This technique adds a subtle and ethereal look to your pages.
-
Heat embossing: Ink the stencil with embossing ink and apply embossing powder. Use a heat gun to melt the powder, creating a raised and glossy design. This technique is perfect for adding a metallic or shimmering effect to your backgrounds.
7.3. Adding Intricate Designs with Masks
To create intricate designs with masks, consider the following techniques:
-
Pencil rubbing: Position a mask onto your page and use a pencil to lightly rub over the design. This technique creates a subtle and textured effect that highlights the intricate details of the mask.
-
Embossing paste: Apply embossing paste through the openings of a mask using a palette knife. Once dry, the embossed design will add dimension and texture to your layouts.
-
Stamping through masks: Place a mask onto your page and use a stamp to apply ink or paint over it. This technique allows you to create unique and detailed designs that can be further embellished or altered.
With stencils and masks, you can effortlessly add intricate designs and captivating backgrounds to your scrapbook pages, creating stunning visual effects.
8. Ephemera and Vintage Elements
Ephemera and vintage elements are wonderful additions to scrapbook pages, adding a sense of nostalgia and personality. These elements can include old photographs, vintage tickets, postcards, letters, and other aged materials that hold sentimental value.
8.1. Incorporating Ephemera into Scrapbook Pages
When incorporating ephemera into your scrapbook pages, consider the following tips:
-
Selecting meaningful pieces: Choose ephemera that holds personal significance or represents the theme or story of your page. This could include items such as handwritten letters, treasured photographs, or special event tickets.
-
Consider preservation: Ensure that your ephemera is properly preserved to prevent deterioration. Consider using archival-safe materials, such as acid-free page protectors or photo corners, to protect these delicate items.
-
Layering elements: Experiment with layering ephemera on your scrapbook pages to create depth and interest. For example, you can place a vintage photograph on a textured piece of patterned paper and then add a ticket or postcard behind it.
8.2. Tips for Finding and Using Vintage Elements
Here are some tips for finding and using vintage elements in your scrapbook pages:
-
Thrift stores and flea markets: Visit thrift stores, flea markets, or antique shops to discover unique vintage elements. Look for old books, postcards, advertisements, or other items that may resonate with your page themes.
-
Digital resources: Consider using digital scrapbooking resources that offer vintage clip art, ephemera, or digital kits. These resources allow you to incorporate vintage elements into your pages without the risk of damage or deterioration.
-
Reproductions: If you are unable to find original vintage items, consider using reproductions or digital prints. Many retailers offer vintage-inspired items that can add a nostalgic touch to your layouts.
8.3. Maintaining Coherence with Ephemera and Vintage Pieces
To maintain coherence in your designs when using ephemera and vintage elements, consider the following:
-
Color matching: Pay attention to the colors of your vintage elements and select patterned papers or embellishments that complement or match these colors. This helps create a cohesive and harmonious look.
-
Balance and placement: When adding vintage elements, ensure that they are evenly distributed throughout your page to maintain balance. Avoid clustering all the vintage pieces in one area, as this can overwhelm the layout.
-
Storytelling: Use your vintage elements to tell a story or evoke a specific emotion. Consider the significance of each item and how it contributes to the overall narrative of your page.
Incorporating ephemera and vintage elements into your scrapbook pages not only adds a personal touch but also preserves cherished memories and creates a timeless quality in your designs.
9. Fabric and Textiles
Fabric and textiles offer unique textures and visual interest that can elevate your scrapbook designs. From patterned paper and ribbons to fabric scraps and lace, incorporating different fabrics into your layouts can add depth and tactile appeal.
9.1. Using Fabric and Textiles in Scrapbook Designs
Here are a few ways you can use fabric and textiles in your scrapbook designs:
-
Patterned paper: Many scrapbooking manufacturers offer patterned papers that mimic fabric patterns, such as plaids, polka dots, or florals. These papers can be used as backgrounds or cut into shapes to create unique embellishments.
-
Ribbons and trims: Ribbons and trims made from fabric are a versatile option for adding texture and dimension to your layouts. Use them as borders, frames, or decorative accents.
-
Fabric scraps: Save small fabric scraps from sewing projects or repurpose old clothing to create unique elements for your scrapbook pages. Cut out shapes, flowers, or even fabric banners to enhance the visual appeal.
9.2. Techniques for Attaching Fabric to Pages
When attaching fabric to your scrapbook pages, keep these techniques in mind:
-
Liquid adhesive: Use a liquid adhesive, such as fabric glue, to secure fabric elements to your layouts. Apply a thin, even layer of glue to the back of the fabric and press it firmly onto the page. Allow sufficient drying time before moving or handling the page.
-
Sewing: If you are comfortable with sewing, consider stitching fabric elements onto your pages. Use a sewing machine or hand-stitching techniques to create borders, frames, or embroidered details.
-
Double-sided tape: Double-sided tape can be a convenient option for attaching fabric ribbons or trims to your layouts. Cut the tape to the desired length, adhere it to the back of the fabric, and press firmly onto the page.
9.3. Incorporating Textile Art into Layouts
Textile art, including embroidery, fabric painting, or appliqué, can add a unique and personal touch to your scrapbook pages. Consider the following techniques:
-
Embroidery: Add hand-stitched embroidery to your designs for a handmade and whimsical look. This can include stitching around shapes, creating decorative borders, or adding intricate patterns.
-
Fabric painting: Use fabric paints or markers to add artistic details to your fabric elements. This can include adding shading, highlights, or hand-lettered quotes.
-
Appliqué: Create fabric appliqués by cutting out fabric shapes and attaching them to your pages using adhesive or sewing techniques. These appliqués can add a dimensional and tactile element to your layouts.
By incorporating fabric and textiles into your scrapbook pages, you can add tactile appeal, visual interest, and a unique touch that sets your designs apart.
11. Metallic and Sparkling Embellishments
Metallic and sparkling embellishments are perfect for adding a touch of glamour and elegance to your scrapbook pages. These embellishments come in various forms, including foil accents, glitter, sequins, and metallic elements.
11.1. Types of Metallic and Sparkling Embellishments
Here are a few types of metallic and sparkling embellishments you can consider for your scrapbook pages:
-
Foil accents: Foil can be used to add a reflective and metallic finish to your designs. It comes in various colors and can be applied to elements such as titles, borders, or shapes.
-
Glitter: Glitter adds sparkle and shine to your layouts. It can be applied directly to adhesive surfaces or mixed with adhesive or glue to create custom glitter accents.
-
Sequins: Sequins are small, shiny embellishments that come in various shapes and colors. They can be adhered to your pages using liquid adhesive or glue dots to add a hint of sparkle.
11.2. Techniques for Using Metallic and Sparkling Embellishments
Here are some techniques for effectively using metallic and sparkling embellishments on your scrapbook pages:
-
Accent pieces: Use metallic elements or glitter to accent specific elements on your page, such as titles, borders, or die-cuts. This creates focal points and draws attention to particular areas of your layout.
-
Shaker elements: Create shaker windows using sequins or glitter. Cut a window or use a pre-made shaker pocket, fill it with sequins or glitter, and adhere it to your page. This adds an interactive and dimensional element that is fun to shake and watch.
-
Custom embellishments: Use metallic elements or glitter to create your own custom embellishments. For example, adhere glitter to chipboard letters or use metallic thread to hand-stitch intricate designs.
11.3. Complementing the Theme with Shimmer and Shine
When using metallic and sparkling embellishments, consider the theme and overall style of your scrapbook page:
-
Formal occasions: Metallic elements such as silver or gold foil accents are perfect for documenting formal events like weddings or anniversaries. They add a touch of elegance and luxury to your layouts.
-
Celebrations: Glitter and sequins are ideal for layouts that celebrate festive occasions like birthdays or holidays. Their sparkle and shine evoke a sense of joy and excitement.
-
Everyday layouts: If your scrapbook page has a more casual theme, consider using metallic pens or markers to add subtle accents or doodles. This adds a hint of shimmer without overpowering the design.
By incorporating metallic and sparkling embellishments into your scrapbook pages, you can add a touch of glamour and shine that enhances the visual appeal of your designs.
Experimenting with Different Embellishments for Stunning Scrapbook Pages Embarking on a journey to create stunning scrapbook pages is an exciting endeavor. By exploring and utilizing different embellishments, you can elevate your designs from ordinary to extraordinary. Whether you choose stickers, die-cuts, ribbons, brads, buttons, washi tape, stencils, ephemera, fabric, or metallic accents, each embellishment offers its own unique charm and creative possibilities.
As you begin your creative journey, start by considering the theme and style of your scrapbook page. This will guide your choice of embellishments and help you achieve a cohesive and visually appealing layout. Additionally, think about the texture, color, and dimension you want to add to your pages, and select embellishments accordingly.
Stickers are an excellent starting point when exploring embellishments. With their wide variety of designs and ease of use, they allow you to quickly and effortlessly enhance your layouts. From creating borders and adding dimension to designing your own patterned paper, stickers offer endless creative possibilities.
Die-cuts add a level of intricacy and sophistication to your scrapbook pages. By incorporating different types of die-cuts, such as paper, chipboard, or acrylic, you can create eye-catching focal points or frame your photos elegantly. Consider combining and layering various die-cut shapes to add depth and dimension to your designs.
Ribbons and trims provide a tactile and luxurious feel to your layouts. They can be used to create borders, bows, or photo corners, adding a touch of elegance or playfulness, depending on the style you desire. Explore different types of ribbons, such as satin, grosgrain, lace, or ricrac, to add texture and visual interest to your pages.
Brads and eyelets are small metal embellishments that can give your scrapbook pages a polished and refined look. Use them to frame photos, attach elements, or create movement with interactive elements. These versatile embellishments can add both decorative and functional elements to your layouts.
Buttons and charms offer a whimsical and personal touch to your scrapbook pages. Whether you opt for decorative buttons, vintage buttons, or charms representing specific themes, these elements can be used to create borders, charms clusters, or dimensional designs. Experiment with layering and combining different materials and colors to add dimension and texture.
Washi tape, with its wide array of vibrant colors and patterns, is a versatile and easy-to-use embellishment. From creating borders and frames to designing unique backgrounds, washi tape adds color and visual interest to your scrapbook pages. Develop your own techniques, such as tearing or cutting the tape, to achieve different effects and unleash your creativity.
Stencils and masks are valuable tools for adding intricate and repetitive designs to your scrapbook pages. Whether you use them with ink, paint, or texture paste, stencils and masks can create beautiful backgrounds, focal points, or texture effects. Consider different techniques, such as ink blending or heat embossing, to achieve stunning and unique designs.
Ephemera and vintage elements bring nostalgia and personality to your scrapbook pages. By incorporating meaningful pieces, such as old photographs, letters, or tickets, you can create layouts that tell a story and preserve cherished memories. Pay attention to color coordination and balance when using ephemera, and consider techniques such as layering to add depth and interest to your designs.
Fabric and textiles add a tactile and unique touch to your scrapbook pages. From patterned papers and ribbons to fabric scraps and lace, these materials can enhance the visual appeal of your layouts. Experiment with different techniques, such as sewing or using liquid adhesive, to attach fabric elements securely to your pages and create textured effects.
Finally, metallic and sparkling embellishments can bring a touch of glamour and elegance to your scrapbook pages. Foil accents, glitter, sequins, and metallic elements can be used to accentuate specific areas, create dimensional effects, or add a festive touch to your layouts. Consider the theme and style of your scrapbook page when selecting metallic and sparkling embellishments to ensure they complement your overall design.
As you explore different embellishments, remember to have fun and let your creativity soar. Mix and match various elements, experiment with different techniques, and personalize your layouts to reflect your unique style and story. By embracing the world of embellishments, you can create stunning and memorable scrapbook pages that will be cherished for years to come.