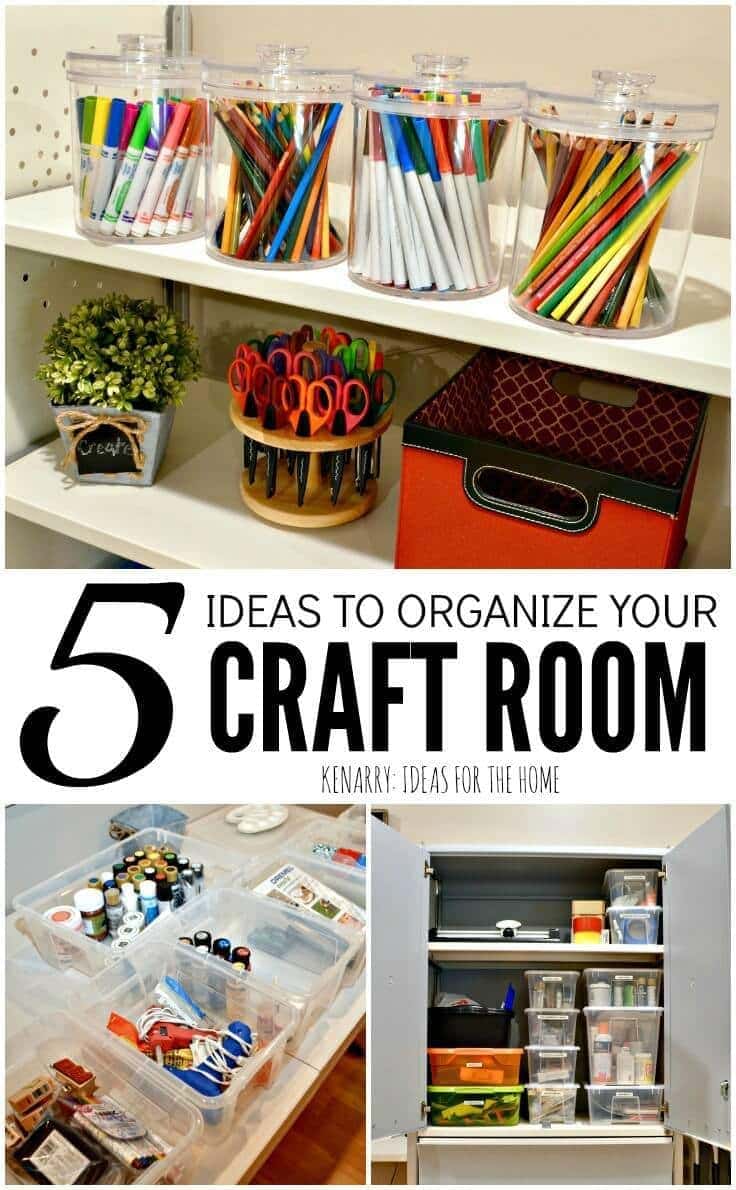
Are you tired of searching for scissors and glue every time you sit down to work on your scrapbooking projects? If so, then you’re in luck! This article will provide you with innovative ideas for creating a clutter-free and organized scrapbooking workspace. From clever storage solutions to practical organization tips, we’ve got you covered. Say goodbye to the days of digging through piles of paper and supplies, and say hello to a neat and efficient crafting space. Get ready to unleash your creativity and enjoy a stress-free scrapbooking experience.
1. Utilize Wall Space
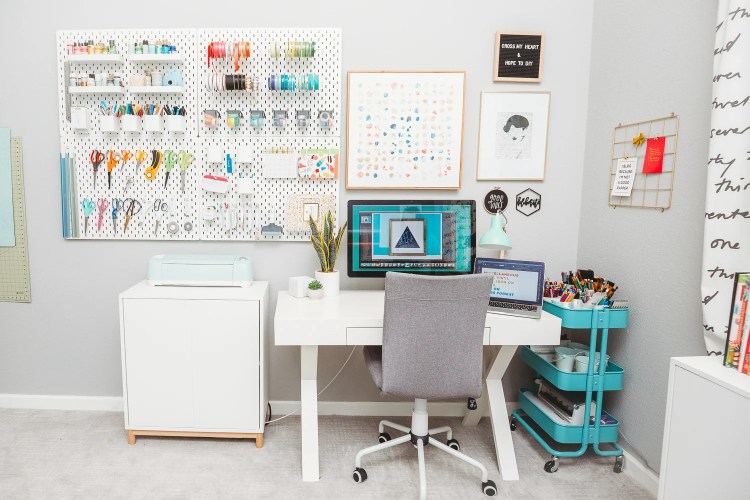
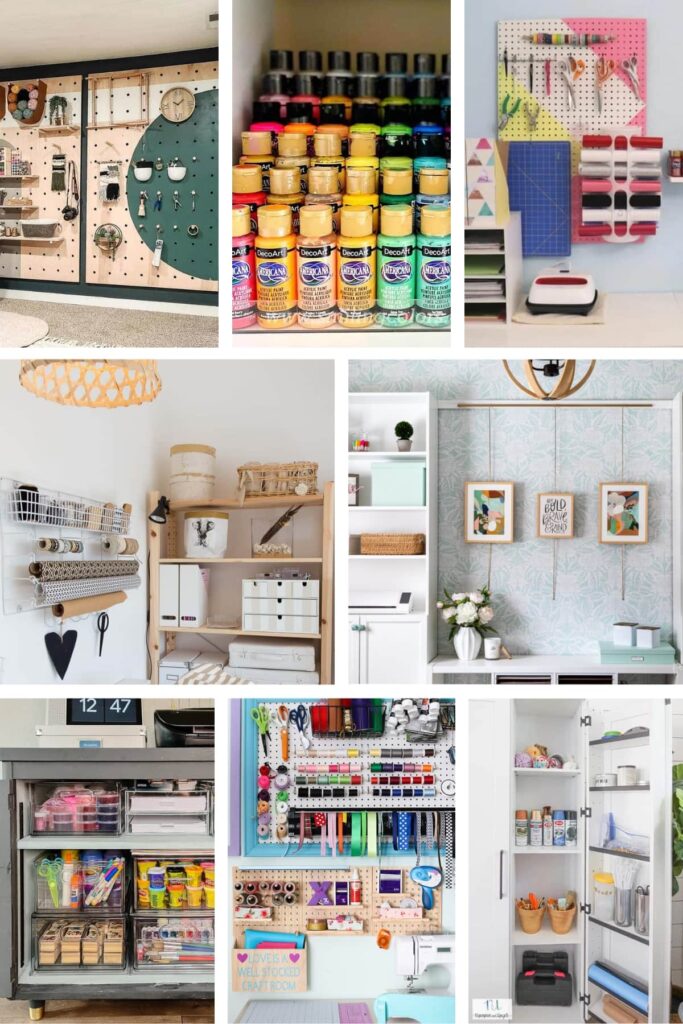
When it comes to organizing your scrapbooking workspace, one of the most efficient ways to maximize your storage is by utilizing wall space. By taking advantage of the vertical space in your craft area, you can free up valuable desk or floor space and keep your supplies easily accessible. Here are a few ideas for making the most of your wall space:
1.1 Hanging Baskets or Shelves
Consider installing hanging baskets or shelves on your walls to create additional storage for your scrapbooking supplies. These can be used to hold items such as embellishments, small tools, or even rolls of washi tape. By keeping these items off your workspace and within reach, you can stay focused on your projects without feeling overwhelmed by clutter.
1.2 Wall-mounted Tool Organizer
A wall-mounted tool organizer is a great way to keep your frequently used tools neatly organized and within reach. With different compartments or hooks, you can easily organize your scissors, punches, and other small tools. This not only helps to prevent them from getting lost or damaged but also makes it easier for you to find what you need when you need it.
1.3 Magnetic Strips for Metal Tools
If you have metal tools such as precision scissors or paper punches, consider using magnetic strips on your walls to store them. By attaching the tools to the magnetic strips, you not only keep them organized but also ensure that they are easily accessible without taking up valuable drawer or desk space. This is not only a practical storage solution but also adds a touch of uniqueness to your scrapbooking space.
2. Invest in Proper Storage Containers
Proper storage containers are essential when it comes to organizing your scrapbooking supplies. Investing in the right containers not only keeps your items organized but also helps protect them from damage. Here are a few types of storage containers to consider:
2.1 Clear Plastic Containers
Clear plastic containers are a staple in any organized craft space. They allow you to easily see what’s inside without having to open every container to find what you’re looking for. Opt for containers with dividers or compartments to keep smaller items, such as buttons or beads, organized within the larger container. This will save you time and prevent frustration when working on your projects.
2.2 Stackable Storage Bins
Stackable storage bins are a convenient solution for storing larger items such as paper pads, sticker sheets, or albums. These bins can be easily stacked on top of each other, making the most of your vertical space. Look for bins with lids to protect your supplies from dust or moisture, ensuring they stay in pristine condition.
2.3 Drawer Dividers for Small Items
If you have a desk or workspace with drawers, consider using drawer dividers to keep your small items organized. Drawer dividers are especially useful for storing items such as pens, markers, or adhesive tapes. By dividing your drawers into different compartments, you not only keep your supplies neatly organized but also prevent them from rolling around and getting damaged.
3. Categorize and Label Supplies
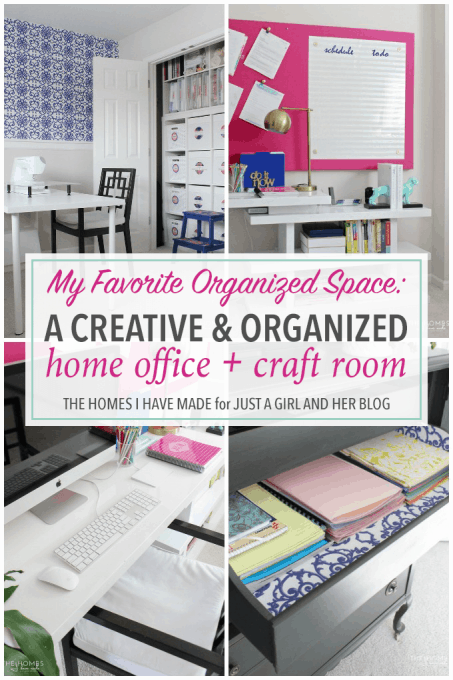
Categorizing and labeling your supplies is crucial for maintaining an organized scrapbooking workspace. When everything has a designated place, it’s easier to find what you need and keep your workspace clutter-free. Here are a few tips for categorizing and labeling your supplies effectively:
3.1 Sorting by Themes or Projects
One effective way to organize your supplies is by sorting them according to themes or specific projects. For example, you can have separate containers or sections for holiday-themed supplies, baby-related supplies, or travel-themed supplies. By grouping your supplies based on their intended use, you can quickly locate what you need when working on a specific project.
3.2 Labeling Boxes and Containers
To make it even easier to find your supplies, be sure to label your boxes and containers. Use clear and legible labels that clearly indicate the contents of each container. This not only helps you locate specific items but also ensures that everything gets put back in its proper place after each use.
3.3 Utilizing Color-Coded Labels
If you want to take your labeling system a step further, consider using color-coded labels. Assign a specific color to each category or theme, and use colored labels on your storage containers to easily identify their contents. This can be especially helpful if you have a large collection of supplies and want to find specific items at a glance.
4. Create a Dedicated Workspace
Having a dedicated workspace is essential for any scrapbooker. Designating a specific area solely for your scrapbooking activities not only allows you to work efficiently but also helps maintain a clutter-free environment. Here are a few tips for creating a dedicated workspace:
4.1 Designating a Scrapbooking Table
Choose a table or desk specifically for your scrapbooking activities. Make sure it has enough space to accommodate your projects and supplies comfortably. This will give you a designated area to work, preventing your projects from spreading throughout the entire room.
4.2 Proper Lighting for Clarity
Good lighting is crucial when working on detailed projects such as scrapbooking. Ensure that your workspace is well-lit to avoid eye strain and achieve optimal clarity. Consider using a combination of natural and artificial lighting, such as a desk lamp or overhead lighting, to provide ample illumination.
4.3 Comfortable Seating
Scrapbooking often involves spending hours at a time working on projects, so it’s important to have a comfortable seating area in your dedicated workspace. Invest in a supportive chair that provides ergonomic support and encourages good posture. This will help prevent discomfort or fatigue during long crafting sessions.
5. Incorporate Vertical Storage Solutions
As mentioned earlier, utilizing vertical storage solutions is a great way to maximize space in your scrapbooking area. In addition to utilizing wall space, here are a few more vertical storage ideas to consider:
5.1 Vertical Paper Storage
Paper is a staple supply in scrapbooking, and finding a proper storage solution for it is essential. Vertical paper storage racks or holders are a great way to keep your paper pads organized and easily accessible. These racks can be placed on your desk or mounted on the wall, saving space and preventing your paper from getting damaged.
5.2 Magazine Files for Patterned Paper
If you have a collection of patterned paper, consider using magazine files to keep them tidy and organized. Label each file with the corresponding theme or pattern, and arrange them vertically on a shelf or in a drawer. This allows you to easily flip through the files and find the perfect paper for your projects without having to search through stacks of loose sheets.
5.3 Wall-Mounted Ribbon Organizer
If you enjoy using ribbons in your scrapbooking projects, a wall-mounted ribbon organizer is a must-have. By attaching ribbons to rods or dowels mounted on the wall, you not only keep them untangled but also add a decorative element to your workspace. This makes it easy to access and choose the perfect ribbon for each project.
6. Utilize Unused Spaces
In addition to your designated workspace, there may be unused spaces in your craft room that can be transformed into additional storage areas. Here are a few ideas to make the most of these spaces:
6.1 Store Supplies Underneath Furniture
If you have furniture in your craft room with empty space underneath, such as a table or desk, consider using it for storage. Use stacking bins or rolling carts to store larger items or supplies that you don’t need on a daily basis. This utilizes otherwise wasted space and keeps your supplies easily accessible.
6.2 Hang Tools on the Back of Doors
The back of doors is another often overlooked storage area. Install hooks or over-the-door organizers on the back of your craft room door to hang tools such as punches, rulers, or cutting mats. This not only keeps them organized but also frees up drawer or shelf space for other items.
6.3 Utilize Closet Space for Storage
If you have a closet in your craft room, take advantage of the space by installing shelves or hanging storage organizers. This allows you to store boxes of supplies, albums, or larger tools out of sight, keeping your craft room looking neat and tidy. By utilizing every inch of space in your closet, you can create a functional storage solution for your scrapbooking supplies.
7. Utilize Digital Scrapbooking Techniques
In this digital age, incorporating digital scrapbooking techniques can help save space and keep your projects organized. Here are a few ideas for going digital with your scrapbooking:
7.1 Scanning Physical Photos
Instead of storing boxes of physical photos, consider scanning them to create digital copies. This not only saves space but also allows you to easily access and organize your photos on your computer. You can then use these digital copies to create personalized digital scrapbook pages or print them out as needed.
7.2 Creating Digital Templates
Digital scrapbooking software allows you to create customized templates for your scrapbook pages. By designing templates for different page layouts or themes, you can easily duplicate and modify them for future projects. This not only saves time but also keeps your digital files organized and easily accessible.
7.3 Organizing Digital Files
To keep your digital scrapbooking files organized, create a folder structure on your computer that mirrors your physical scrapbooking categories or themes. Label each folder clearly and sort your digital files accordingly. This makes it easy to locate specific files when you’re ready to create a digital scrapbook page or print out your designs.
8. Incorporate a Portable Scrapbooking Station
If you enjoy crafting on the go or would like the flexibility of using different spaces for your scrapbooking projects, consider incorporating a portable scrapbooking station. Here are a few items to include in your portable setup:
8.1 Rolling Cart with Storage Baskets
Invest in a sturdy rolling cart with storage baskets or drawers to hold your essential supplies. This allows you to easily transport your tools, papers, and embellishments to any location in your home or even outside. Look for a cart with lockable wheels to ensure stability while working on different surfaces.
8.2 Portable Tool Caddy
A portable tool caddy is a handy item to have in your portable scrapbooking station. Fill it with your most frequently used tools such as scissors, adhesive, and pens, ensuring that they are easily accessible wherever you choose to work. A caddy with multiple compartments or pockets helps keep your tools organized and prevents them from getting lost.
8.3 Foldable Scrapbooking Desk
If you frequently craft in different spaces, a foldable scrapbooking desk can be a game-changer. These desks are designed to be compact and lightweight, making them easy to set up and pack away when not in use. Look for a desk with built-in storage compartments or shelves to keep your supplies within reach and prevent them from cluttering your workspace.
9. Use Multi-Purpose Furniture
Multi-purpose furniture is a great way to maximize space in your scrapbooking area while keeping it stylish and functional. Here are a few examples of multi-purpose furniture that can help with organizing your supplies:
9.1 Scrapbooking Storage Ottomans
Storage ottomans are not only a comfortable seating option but also provide hidden storage space. Look for ottomans with removable tops or compartments that can be used to store scrapbooking supplies such as paper, albums, or even small tools. This allows you to have extra seating in your craft room while keeping your supplies conveniently nearby.
9.2 Desks with Built-in Storage
If you’re in the market for a new desk, consider investing in one with built-in storage solutions. Look for desks with drawers, shelves, or cubbies that can be used to store your supplies. This eliminates the need for additional storage furniture and keeps your workspace clean and clutter-free.
9.3 Bookshelf with Integrated Workspace
If you have limited space in your craft room, consider investing in a bookshelf with an integrated workspace. These innovative pieces of furniture have a workspace on one side and shelves on the other, perfect for storing your supplies and displaying your completed projects. This not only saves space but also adds a stylish element to your scrapbooking area.
10. Establish an Inspiration Board
An inspiration board is a fantastic addition to any scrapbooking workspace. This visual display of ideas, colors, and inspiration can keep you motivated and help spark creativity. Here are a few ideas for creating an inspiration board:
10.1 Corkboard or Magnetic Board
Choose a corkboard or magnetic board as the base for your inspiration board. Consider the size and placement, ensuring it fits well within your workspace. Hang it on a wall or lean it against a surface for easy access.
10.2 Pinning Ideas and Inspiration
Pin or attach physical items such as color swatches, magazine cutouts, or even sketches to your inspiration board. These can serve as a reference when working on your scrapbooking projects, ensuring that you capture your initial inspiration and translate it into your designs.
Remember, an inspiration board is not only a visual display but also a reflection of your unique style and creative journey. Personalize it with elements that inspire and motivate you, and don’t be afraid to update it as your tastes and ideas evolve.
In conclusion, organizing your scrapbooking toolkit is an essential step in maintaining a neat and efficient crafting space. By utilizing wall space, investing in proper storage containers, categorizing and labeling supplies, creating a dedicated workspace, incorporating vertical storage solutions, utilizing unused spaces, using digital scrapbooking techniques, incorporating a portable scrapbooking station, using multi-purpose furniture, and establishing an inspiration board, you can create a clutter-free and organized scrapbooking workspace. With these innovative ideas, you’ll be able to keep your supplies easily accessible, stay motivated, and enjoy your scrapbooking projects to the fullest. Happy crafting!

