Whether you’re a seasoned scrapbooker or just starting out on your creative journey, one thing is for sure: having an organized scrapbooking toolkit is essential for a stress-free crafting experience. In this article, we will explore some practical tips and storage solutions to help you keep your scrapbooking tools neat, easily accessible, and clutter-free. With these organization ideas, you’ll be able to create beautiful memories without the hassle of searching for misplaced supplies. So, let’s dive in and discover how to create a more efficient and enjoyable crafting space!
1. Sort and Categorize Your Scrapbooking Tools
Group Similar Tools Together
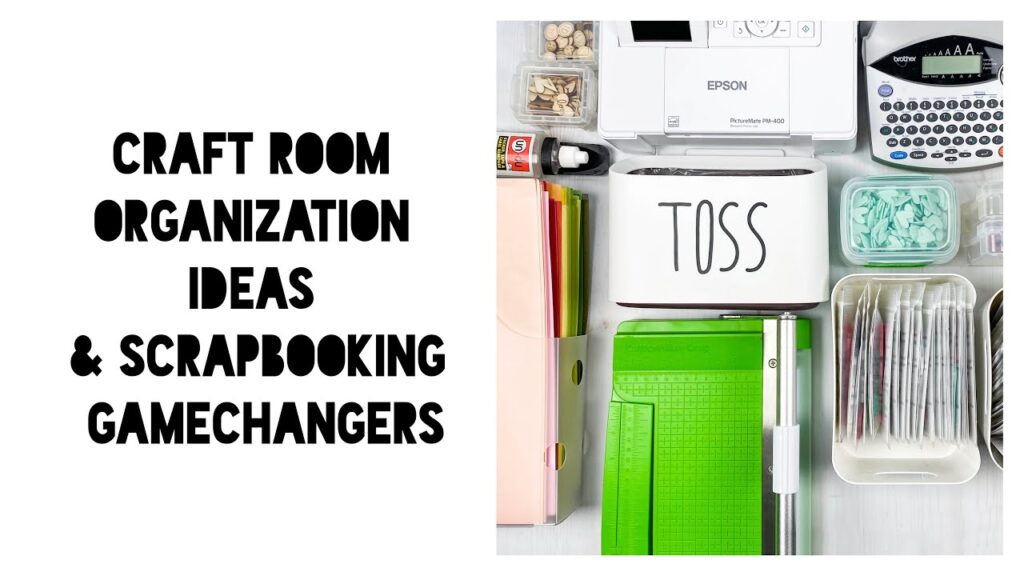
To start organizing your scrapbooking tools, begin by grouping similar items together. This will make it easier to find what you need when working on your projects. For example, gather all your cutting tools, such as scissors, paper trimmers, and craft knives, and place them in one designated area. Similarly, group adhesive products like glue, tape, and adhesive sheets together. By doing this, you can easily locate the specific tool you need without rummaging through various items.
Create Categories
Next, create categories for your scrapbooking tools. This will further help in organizing and locating your supplies quickly. Some common categories include cutting tools, adhesive products, writing instruments, and embellishments. By creating clear categories, you’ll have a better understanding of where each tool belongs, making it easier to maintain an organized workspace.
Label Each Category
After creating categories for your scrapbooking tools, label each category using clear and concise labels. Labels can be created using a label maker or simply handwritten. By labeling each category, you can quickly identify where each tool belongs and ensure that it is returned to its designated space after use. This will save you time and frustration when searching for a specific item.
2. Declutter Your Scrapbooking Supplies
Remove Unwanted or Duplicate Items
As with any organizational project, decluttering is an essential step to achieve an organized scrapbooking toolkit. Take the time to go through your supplies and remove any unwanted or duplicate items. If you come across items that you no longer use or love, consider donating or selling them. This will not only free up space in your craft area but also reduce visual clutter, making it easier to locate and access your favorite supplies.
Donate or Sell Unused Supplies
While decluttering, consider donating or selling your unused supplies. There may be other crafters out there who would appreciate your unwanted items. Look for local craft supply swap events or online groups where you can connect with others who may be interested in purchasing or trading for your unused supplies. This not only helps you declutter but also gives these supplies a chance to be used and loved by others.
Store Supplies in Clear Containers
To maintain a clutter-free space, invest in clear storage containers for your scrapbooking supplies. Clear containers allow you to see the contents without having to open each box, saving you time and making it easier to find what you need. Consider using plastic bins, stackable drawers, or even repurposed food containers. Just make sure to label each container, so you know exactly what is stored inside.
3. Designate a Dedicated Scrapbooking Area
Choose a Well-lit and Well-ventilated Space
Having a well-lit and well-ventilated space is crucial when setting up your scrapbooking area. Natural light is ideal for accurately matching colors and seeing intricate details in your projects. If natural light is limited, consider investing in good-quality LED lights that mimic daylight. In addition to lighting, ensure that the space is adequately ventilated to help prevent the accumulation of dust and keep the air fresh.
Consider the Size of Your Workspace
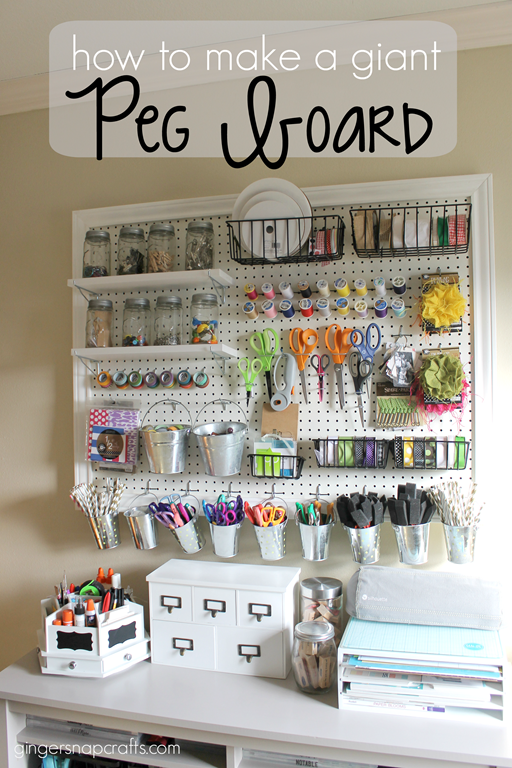
Before setting up your scrapbooking area, consider the size of your workspace. Ensure that you have enough room to comfortably work on your projects without feeling cramped. Take into account the size of your supplies, such as paper, albums, and cutting mats, and make sure you have enough space to store and access them easily. If space is limited, consider utilizing vertical storage options, such as wall-mounted shelving or pegboards.
Create a Functional Workstation
Once you have chosen the perfect space for your scrapbooking area, create a functional workstation. This includes setting up a desk or table at a comfortable height and ensuring that you have enough surface area to work on. Consider investing in a dedicated scrapbooking desk with built-in storage compartments and shelves to keep your tools within reach. Optimize your workstation by arranging your tools and supplies in a way that makes the most sense for your workflow.
4. Invest in Storage Solutions
Use Shelving Units or Bookcases
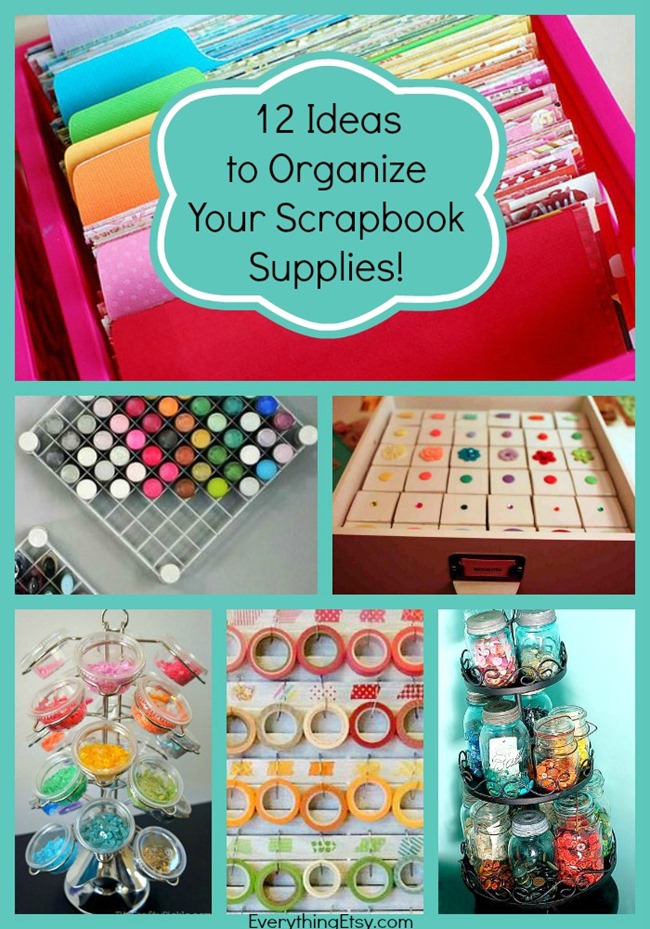
Investing in shelving units or bookcases is a great way to maximize vertical storage space in your scrapbooking area. These storage solutions provide ample space to store albums, paper packs, and other larger items. You can also utilize storage bins or baskets on the shelves to keep smaller supplies organized and easily accessible. Arrange items by category or color to create an aesthetically pleasing and organized display.
Utilize Drawer Organizers
Utilize drawer organizers to keep your smaller scrapbooking supplies neatly arranged. Drawer organizers with compartments of various sizes are perfect for storing small embellishments like brads, buttons, and beads. By using drawer organizers, you can avoid the frustration of rummaging through a messy drawer and easily find the specific item you need for your project.
Consider Wall-Mounted Storage Options
If you’re limited on floor or desk space, consider utilizing wall-mounted storage options. Pegboards are a popular choice among crafters as they provide a versatile and customizable storage solution. You can hang hooks, baskets, and shelves on a pegboard to hold your tools and supplies. This not only keeps your workspace organized but also adds a decorative element to your scrapbooking area.

5. Keep Essentials Within Reach
Organize Tools by Frequency of Use
When organizing your scrapbooking tools, consider grouping them by frequency of use. Keep the tools you use most often within easy reach, while those used less frequently can be stored in less accessible areas. This will help you work more efficiently by avoiding unnecessary time spent searching for tools. Consider using a wall-mounted tool caddy or a rotating lazy Susan to keep frequently used items readily available on your workspace.
Consider Using a Tool Caddy or Lazy Susan
A tool caddy or lazy Susan is a great organizational tool to keep your essentials within reach. These rotating storage solutions allow you to easily access your frequently used tools without having to search through drawers or shelves. Fill the caddy or lazy Susan with your most commonly used pens, scissors, adhesive, and other tools. By having these items readily available, you can focus more on your creative process and less on finding the right tool.
Utilize Desk or Tabletop Organizers
For smaller scrapbooking tools and supplies, consider utilizing desk or tabletop organizers. These organizers usually have multiple compartments and dividers, perfect for holding markers, stickers, washi tape, and other small items. Place the organizer near your workspace to keep your essential supplies within arm’s reach while working on your projects.
6. Use Clear Containers and Labels
Store Supplies in Clear Plastic Bins or Boxes
When storing your scrapbooking supplies, opt for clear plastic bins or boxes. Clear containers allow you to see the contents at a glance without having to open each box, making it easier to find what you need. Choose containers of various sizes to accommodate different types of supplies. Store larger items like albums and paper packs in bigger bins, while smaller items like stickers and die cuts can be stored in smaller boxes.
Label Containers and Drawers
To make it even easier to locate and retrieve your supplies, label each container and drawer. Use clear and concise labels that clearly describe the contents of each container. Consider using a label maker or printable labels for a neater and more uniform look. By labeling your containers, you can quickly identify where each item belongs, saving you time and effort when searching for specific supplies.
Utilize Transparent Pouches or Ziplock Bags
For loose or smaller items like ribbon scraps, die cuts, and ephemera, consider utilizing transparent pouches or ziplock bags. These clear, plastic bags provide an easy way to keep your supplies organized without them becoming tangled or lost. Label each bag with its contents or use a larger pouch to hold a specific category of items. This ensures that everything stays in its designated place and is easily visible when needed.

7. Create a Digital Scrapbooking Toolkit
Scan and Digitize Paper Scraps and Photos
Digital scrapbooking is gaining popularity, and creating a digital toolkit can be a great way to organize your supplies in a different format. Start by scanning and digitizing your paper scraps and photos. This allows you to store them on your computer or in the cloud, minimizing physical clutter. Digital files can be easily accessed, resized, and incorporated into your projects without the need for physical storage.
Organize Digital Files in Folders
Once you have digitized your scrapbooking materials, organize your digital files in folders. Create a folder structure that works best for you, such as categorizing files by project type, theme, or date. Name files descriptively to make it easier to find what you need when working on a specific project. Consider creating subfolders within each main folder to further organize your digital assets.
Back up Your Digital Scrapbooking Collection
Just as you would with physical supplies, it is essential to back up your digital scrapbooking collection. Invest in an external hard drive or utilize cloud storage services to create a backup of your files. This ensures that your digital assets are protected in case of computer or storage failure. Regularly update your backups to include new files and changes to your existing collection.
8. Maintain an Inventory Checklist
Keep Track of Your Scrapbooking Supplies
To stay organized and avoid purchasing duplicate items, keep track of your scrapbooking supplies using an inventory checklist. Start by listing all the items in your collection, including paper, embellishments, stamps, and tools. You can create a physical checklist using a notebook or utilize digital tools, such as spreadsheets or inventory management apps. Take inventory regularly to update the quantities and identify any missing or low-stock items.
Update the Checklist Regularly
To ensure the accuracy of your inventory checklist, make it a habit to update it regularly. Whenever you purchase new supplies or finish using existing items, update the quantities on your checklist. This will help you keep track of your inventory, manage your supplies efficiently, and prevent unnecessary duplicate purchases.
Include Details such as Quantity and Location
In addition to item names, consider including details like quantities and storage locations on your inventory checklist. This provides a comprehensive overview of your supplies and makes it easier to locate specific items when needed. For example, note down how many sheets of a particular paper you have and which bin or drawer it is stored in. This level of detail helps you stay organized and saves you time when searching for specific supplies.

9. Establish a Cleaning Routine
Regularly Clean and Dust Your Scrapbooking Area
Maintaining a clean and dust-free scrapbooking area is essential for the longevity of your tools and supplies. Make it a habit to regularly clean and dust your workspace using a microfiber cloth or a gentle cleaning solution. Wipe down surfaces, shelves, and storage containers to remove any dust or debris that may accumulate. This not only keeps your area looking clean and inviting but also prevents dust from settling on your tools and materials.
Wipe Down Tools and Surfaces After Each Use
After completing a scrapbooking session, take a few moments to wipe down your tools and surfaces. Use a damp cloth to clean any adhesive residue or ink stains from your tools. This prevents buildup and ensures that your tools remain in good working condition. Additionally, wipe down your work surface to remove any lingering scraps or debris. Taking these small steps after each use will help maintain a tidy and organized workspace.
Have Dedicated Cleaning Supplies and Tools
To make your cleaning routine easier and more efficient, have dedicated cleaning supplies and tools within reach. Keep a container of cleaning wipes or a bottle of solution specifically for cleaning your scrapbooking area. Have a small brush or compressed air can to remove dust from hard-to-reach areas. By keeping these items readily available, you can quickly and easily clean your workspace without searching for the necessary supplies.
10. Seek Inspiration and Organization Ideas
Join Scrapbooking Communities or Groups
One of the best ways to find inspiration and organization ideas is by joining scrapbooking communities or groups. Connect with fellow crafters who share your passion and exchange ideas and tips. These communities often have forums or social media groups where you can ask for advice or browse through previous discussions for organizational inspiration. You may discover new techniques, storage solutions, or even new scrapbooking friends.
Follow Blogs and Social Media Accounts
Another great source of inspiration and organization ideas is blogs and social media accounts dedicated to scrapbooking. Many talented crafters and organizers share their tips, layouts, and storage solutions online. Find blogs or Instagram accounts that align with your style and follow them to stay updated with the latest trends and techniques. You can also search for specific hashtags related to scrapbooking organization to find more ideas from the crafting community.
Attend Scrapbooking Workshops or Conventions
Consider attending scrapbooking workshops or conventions to further expand your knowledge and gain firsthand experience from experts in the field. These events often include sessions dedicated to organizing techniques and innovative storage solutions. Attendees can learn from experienced crafters and even participate in hands-on activities. Workshops and conventions provide a valuable opportunity to learn, share ideas, and network with other enthusiasts.
In conclusion, organizing your scrapbooking toolkit is essential for maintaining a neat and efficient crafting space. By following these tips, you can sort and categorize your supplies, declutter unwanted items, and create a dedicated scrapbooking area. Investing in storage solutions, keeping essentials within reach, and using clear containers and labels will help you stay organized. Additionally, consider creating a digital scrapbooking toolkit, maintaining an inventory checklist, establishing a cleaning routine, and seeking inspiration and organization ideas from the scrapbooking community. By implementing these strategies, you’ll have a well-organized and enjoyable environment for your scrapbooking adventures.


