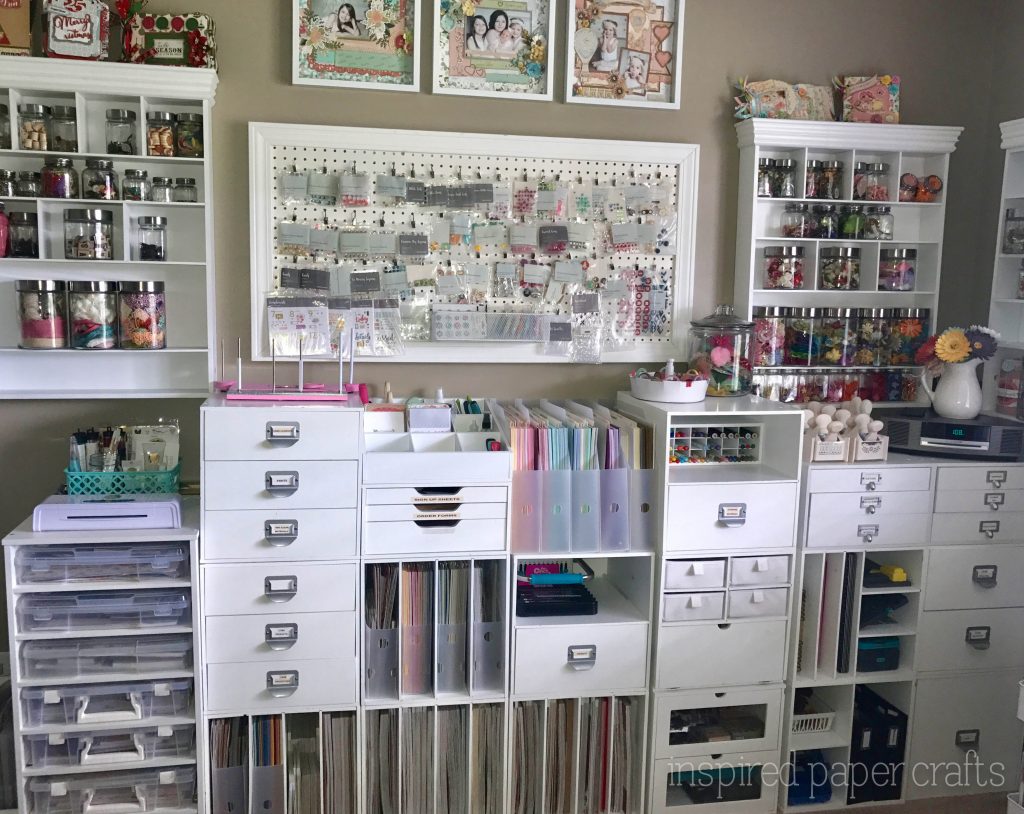
Get ready to take your scrapbooking game to the next level with our article, “Transform Your Scrapbooking Space: Organization Techniques and Ideas.” In this article, we will explore various organizing tips and storage solutions to help you create a neat and efficient crafting space. Discover how to keep your tools easily accessible and clutter-free with our expert advice. Whether you’re a seasoned scrapbooker or just starting out, these organization techniques will revolutionize the way you work and inspire your creativity. Let’s dive in and transform your scrapbooking space!
Section 1: Decluttering and Sorting
Step 1: Assessing your scrapbooking supplies
Before diving into the organization process, take the time to assess your scrapbooking supplies. Gather all of your materials and lay them out in a designated area. This step allows you to visually see how much you have and helps you identify any duplicates or items that you no longer need.
Step 2: Sorting supplies into categories
Once you have assessed your supplies, it’s time to start sorting them into categories. Create broad categories such as paper, stickers, embellishments, and tools. As you sort through your supplies, place each item into the appropriate category. This step will make it easier to locate specific items later on.
Step 3: Purging unnecessary or unused items
Now that you have your supplies sorted into categories, it’s time to purge any unnecessary or unused items. Be honest with yourself and ask if you truly need or use each item. Consider donating or giving away items that are still in good condition but no longer serve a purpose for you. This step will help eliminate clutter and make room for the items that truly bring you joy.
Step 4: Creating a designated space for each category
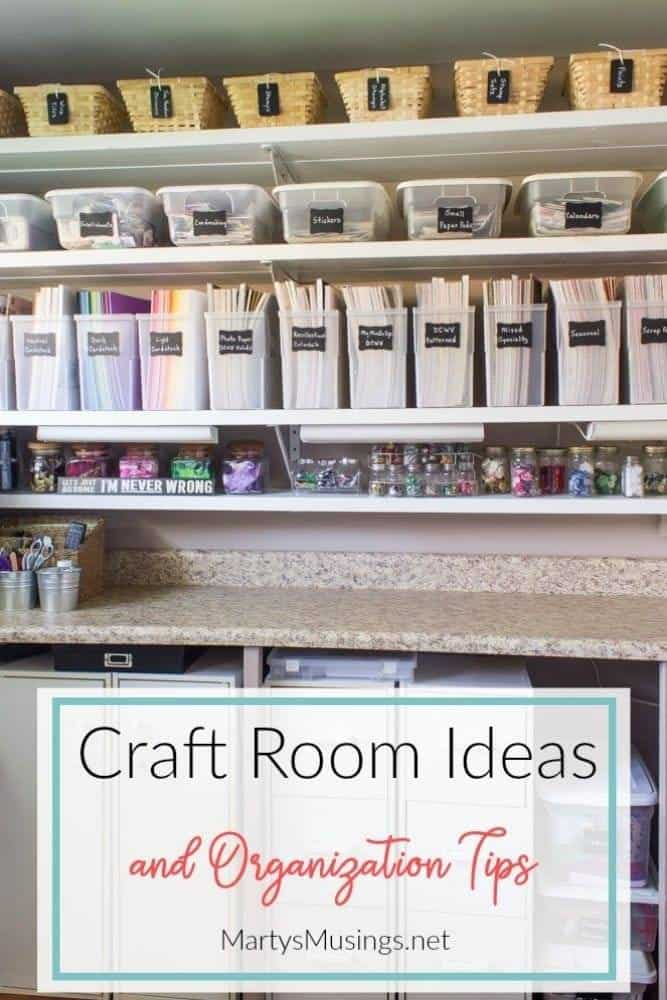
To maintain an organized scrapbooking space, it’s crucial to have a designated space for each category of supplies. Consider using clear plastic bins or storage containers with dividers to separate and store your materials. Label each bin or container with the corresponding category to make it easy to locate and put away items. Having a designated space for each category will streamline your workflow and reduce the chances of misplacing items.
Section 2: Maximizing Storage
Step 1: Choosing the right storage solutions
When it comes to storing your scrapbooking supplies, it’s essential to choose the right storage solutions. Consider your space constraints, budget, and personal preferences. Some popular options include storage cubes, shelves, hanging organizers, and drawer units. Select storage solutions that are functional, visually appealing, and fit well within your space.
Step 2: Utilizing vertical space
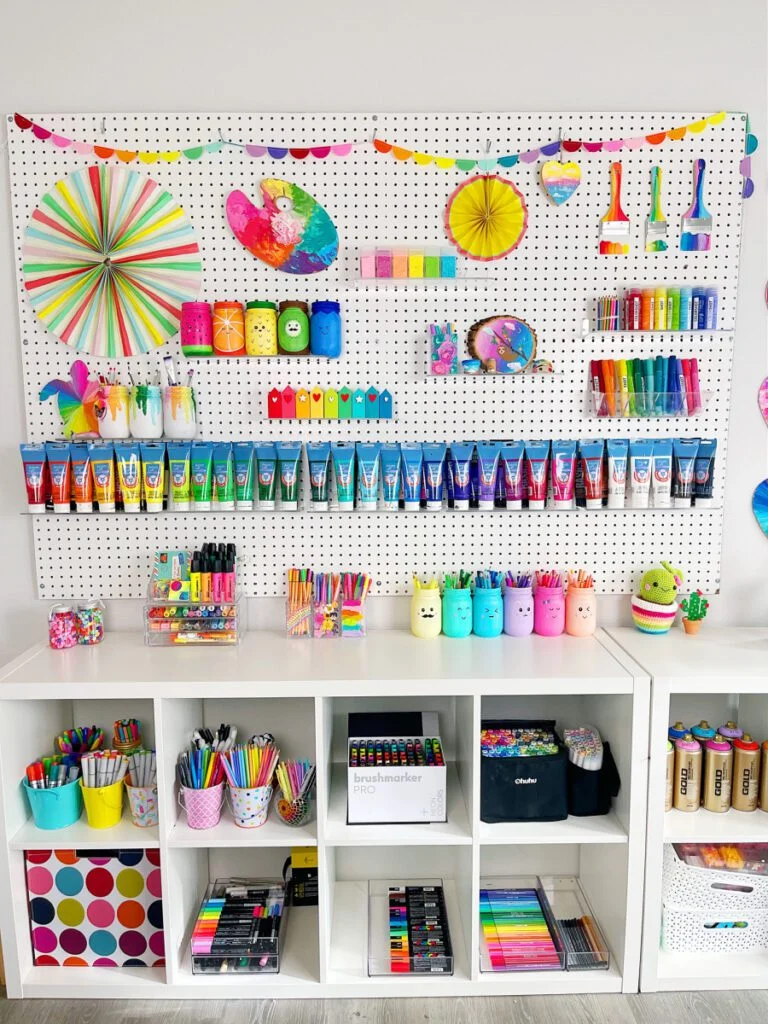
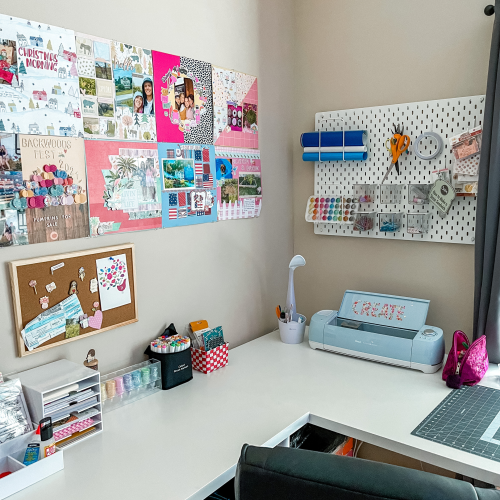
Make the most of your scrapbooking space by utilizing vertical storage options. Install shelves or hanging organizers on the walls, above your crafting table or workspace. This will free up valuable tabletop or counter space and keep your supplies within easy reach. You can also hang pegboards or use wall-mounted baskets to store tools and small embellishments. Vertical storage is a great way to maximize your space and keep your supplies organized and accessible.
Step 3: Implementing drawer dividers and organizers
If you have drawers in your crafting space, make use of drawer dividers and organizers. These tools will help you separate and categorize small items such as stickers, pens, and adhesive. By keeping similar items together, you can easily find what you’re looking for and prevent your drawers from becoming a jumbled mess. Drawer dividers and organizers come in various sizes and can be adjusted to fit your specific needs.
Step 4: Using clear containers for easy visibility
When storing your scrapbooking supplies, opt for clear containers whenever possible. Clear containers allow you to see the contents without having to open them, which saves time and keeps your supplies organized. Use clear plastic bins or containers for storing larger items such as paper, albums, and bulk embellishments. When everything is visible, you can quickly locate what you need and maintain a clutter-free space.
Step 5: Labeling storage bins and containers
To enhance the organization of your scrapbooking space, make sure to label your storage bins and containers. Use adhesive labels or label makers to clearly identify the contents of each container. This step will save you time and effort when searching for specific supplies. It also helps you maintain the organization over time, as you will know exactly where each item belongs.
Section 3: Designing an Efficient Workflow
Step 1: Evaluating your workflow
Take a moment to evaluate your current scrapbooking workflow. Consider how you move from one task to another and identify any areas that could be improved. Pay attention to the flow of your workspace and how easily accessible your supplies and tools are. This evaluation will help you create a more efficient and organized scrapbooking space.
Step 2: Setting up a dedicated work area
Having a dedicated work area is essential for an efficient workflow. Set up a workspace where you can focus solely on your scrapbooking projects without distractions. This area should include your crafting table or desk and have easy access to your most frequently used supplies. By creating a dedicated work area, you’ll be able to work efficiently and keep your supplies organized.
Step 3: Organizing tools based on frequency of use
Consider the frequency with which you use your scrapbooking tools and organize them accordingly. Keep your most frequently used tools within arm’s reach of your work area. This may include items like scissors, adhesive, and pens. Less frequently used tools can be stored in drawers or containers nearby. By organizing your tools based on frequency of use, you’ll be able to work more efficiently and eliminate unnecessary clutter on your workspace.
Step 4: Creating zones for different crafting tasks
Another helpful tip for designing an efficient workflow is to create zones for different crafting tasks. Designate specific areas of your workspace for different stages of the scrapbooking process, such as cutting and trimming, assembling layouts, and journaling. This approach will streamline your workflow and prevent unnecessary back-and-forth movement. Having designated zones will also help you stay focused and organized throughout your scrapbooking projects.
Section 4: Utilizing Creative Display and Inspiration Boards
Step 1: Designing a personalized inspiration board
An inspiration board is a great way to stay motivated and organized while scrapbooking. Design a personalized inspiration board where you can display photos, quotes, color palettes, and other elements that inspire your creativity. Hang the board near your crafting area so that you can easily refer to it during your projects. Your personalized inspiration board will keep you motivated and help you stay organized throughout the creative process.
Step 2: Displaying completed scrapbook pages
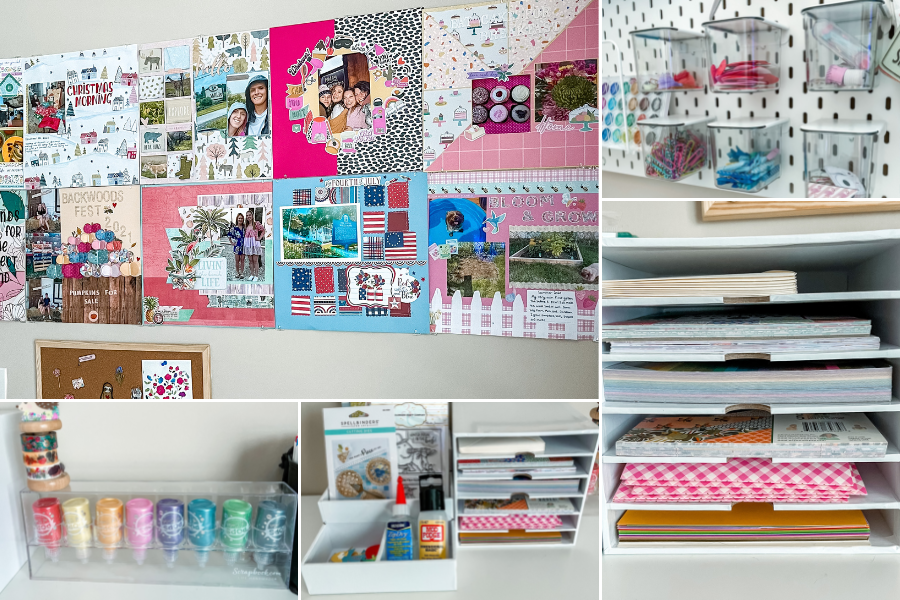
Once you’ve completed your scrapbook pages, don’t let them gather dust in storage. Instead, create a designated area in your scrapbooking space to display your favorite completed pages. Use picture frames or clear page protectors to showcase your work. Displaying your completed pages not only adds a personal touch to your space but also serves as a reminder of your creativity and accomplishments.
Step 3: Showcasing favorite scrapbooking supplies
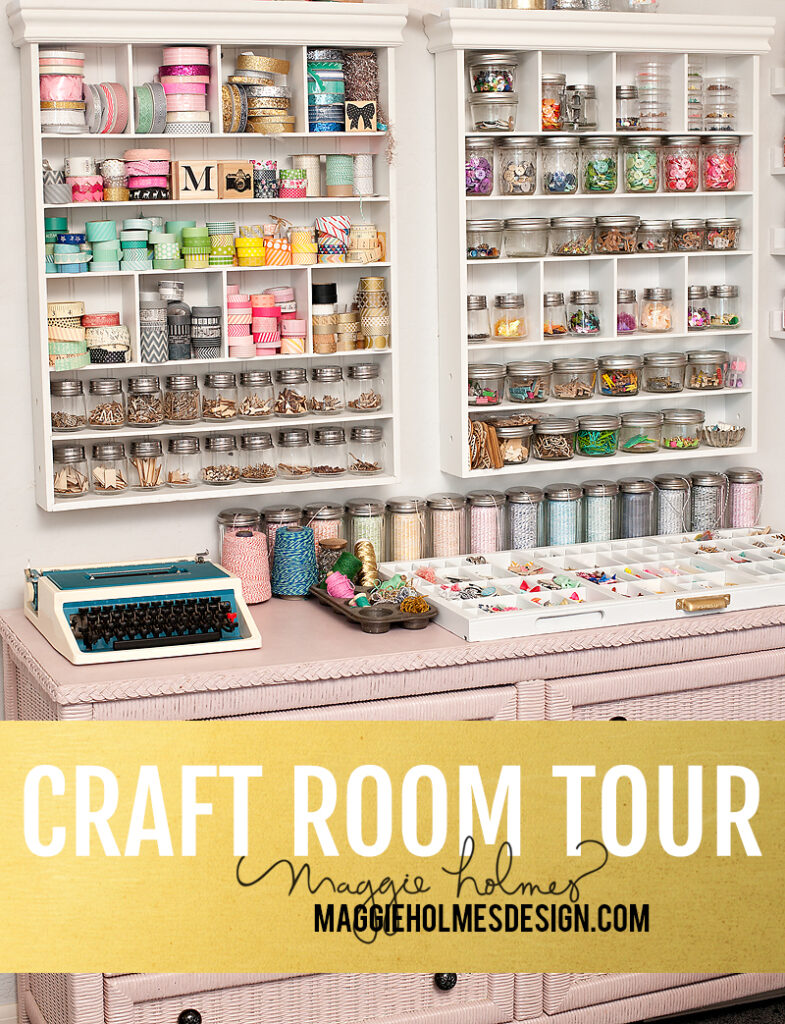
Alongside your completed pages, consider showcasing some of your favorite scrapbooking supplies. This could include unique stamps, decorative tapes, or specialty papers. Use small shelves, clear acrylic displays, or decorative jars to showcase these supplies in an organized and visually appealing way. By showcasing your favorite supplies, you’ll feel inspired to use them in your projects and add a personal touch to your space.
Step 4: Incorporating motivational quotes and images
Motivational quotes and images can serve as daily reminders of your creative passion and goals. Print or create your favorite quotes and images and incorporate them into your scrapbooking space. Display them on a pinboard, stick them on your walls, or frame them for your desk. Surrounding yourself with motivational elements will help keep you inspired, focused, and organized in your scrapbooking endeavors.
Section 5: Organizing Papers, Photos, and Embellishments
Step 1: Sorting and categorizing papers
Sorting and categorizing your papers is essential for an organized scrapbooking space. Start by sorting your papers into categories such as solid colors, patterned papers, and specialty papers. Within each category, further categorize them by color or theme. Store your papers in clear plastic sleeves, labeled file folders, or magazine holders to keep them easily accessible and protected from damage.
Step 2: Storing photos safely and systematically
Photos are a crucial component of scrapbooking, so it’s important to store them safely and systematically. Consider using archival-quality photo albums or acid-free storage boxes to preserve and protect your photos. Sort your photos chronologically or by theme to make it easier to find specific images later on. Label each album or storage box with relevant details, such as dates or events, to further assist with organization.
Step 3: Organizing embellishments by theme or type
Embellishments, such as stickers, die-cuts, and ribbons, can easily become disorganized if not properly sorted. Create a system for organizing your embellishments based on theme or type. Use small storage containers, like divided trays or clear drawer organizers, to keep them sorted and easily accessible. Consider separating them by color or style within each category for added organization.
Step 4: Using binders and page protectors for easy access
Binders and page protectors are excellent tools for organizing and storing smaller scrapbooking materials. Use binders fitted with plastic sheet protectors to store items like stickers, die-cuts, and patterned paper scraps. Label each binder and divide the sheet protectors by category or theme. This method allows you to easily flip through and access your materials while keeping them neatly organized.
Section 6: Enhancing Organization with Digital Tools
Step 1: Digitizing scrapbooking materials and memories
Consider digitizing your scrapbooking materials and memories to enhance organization and accessibility. Scan or photograph your physical scrapbook pages, papers, and embellishments. This allows you to create digital backups and easily access your creations on your computer or mobile devices. Digitizing also eliminates the need for physical storage space, making it a great option for those with limited space.
Step 2: Utilizing digital scrapbooking software
Take advantage of digital scrapbooking software to organize and create digital scrapbook pages. These programs offer a wide range of design options and templates, allowing you to create beautiful layouts without the need for physical supplies. Digital scrapbooking software also provides organization tools, such as tags and folders, to keep your digital materials easily accessible and organized.
Step 3: Creating a digital inventory of supplies
To maintain an organized digital scrapbooking space, create a digital inventory of your supplies. This can be done using a spreadsheet or specialized software designed for inventory management. Include details such as the name, type, and source of each digital item in your inventory. This step will help prevent duplicate purchases and make it easier to locate specific digital materials when needed.
Step 4: Organizing digital files and folders
Just like physical materials, digital files and folders need to be organized for easy access. Create a folder structure that mirrors your physical organization system. Arrange your digital files and folders by category, theme, or project. Use descriptive file names and tags to make it easy to search for specific files. Regularly review and declutter your digital files to maintain a well-organized and efficient digital scrapbooking space.
Section 7: Incorporating Time-Saving Techniques
Step 1: Preparing kits for future projects
Save time by preparing kits for future scrapbooking projects. Gather and organize all the supplies you’ll need for a particular project, such as papers, embellishments, and photos, into a single container or bag. This way, when you’re ready to start a new project, you can simply grab a kit and get to work without searching for individual supplies. Preparing kits in advance streamlines the creative process and keeps you organized.
Step 2: Streamlining the scrapbooking process
To further streamline your scrapbooking process, develop a routine or workflow that works best for you. This could involve batching similar tasks, such as cutting and trimming multiple photos at once, or completing similar steps for multiple pages. Find ways to eliminate unnecessary steps and simplify your process without sacrificing creativity. By streamlining your scrapbooking process, you’ll save time and reduce clutter.
Step 3: Using templates and pre-designed elements
Save time and maintain organization by utilizing templates and pre-designed elements. Templates provide a structure for your scrapbook pages, allowing you to focus on creativity rather than layout design. Pre-designed elements like themed stickers or die-cuts can help speed up the embellishing process. Incorporate these time-saving techniques into your projects to stay organized and efficiently complete your scrapbooking endeavors.
Step 4: Batch processing repetitive tasks
For repetitive tasks, such as cutting multiple photos to the same size or creating identical titles, consider batch processing. Set aside dedicated time to complete these tasks in one sitting. This method allows you to work more efficiently and reduces the overall time spent on repetitive tasks. By batch processing these tasks, you’ll be able to maintain organization and ensure consistency in your scrapbooking projects.
Section 8: Maintaining an Organized Space
Step 1: Establishing a cleaning and maintenance routine
To maintain an organized scrapbooking space, establish a regular cleaning and maintenance routine. Set aside a specific time each week to tidy up your space, put away supplies, and declutter any items that may have accumulated. By incorporating this routine into your schedule, you’ll be able to enjoy a consistently organized and clutter-free scrapbooking space.
Step 2: Regularly decluttering and reevaluating supplies
Regularly decluttering and reevaluating your supplies is crucial for maintaining an organized space. Set aside time every few months to go through your materials and assess what is still serving a purpose for you. Donate or give away items that no longer fit your style or interests. Dispose of any materials that are damaged or no longer usable. By regularly decluttering, you’ll keep your space organized and prevent unnecessary accumulation of supplies.
Step 3: Staying on top of organization with a calendar
A calendar can be a helpful tool for staying on top of organization in your scrapbooking space. Use it to schedule regular cleaning and decluttering sessions, as well as to plan out specific projects or tasks. By incorporating your scrapbooking-related activities into your calendar, you’ll ensure that you have dedicated time for organization and creativity.
Step 4: Seeking inspiration from other organized spaces
Don’t forget to seek inspiration from other organized spaces! Browse through magazines, websites, or social media platforms to see how others organize their scrapbooking spaces. Take note of any ideas or storage solutions that may work well for your own space. Drawing inspiration from others can help spark new ideas and keep you motivated in maintaining an organized scrapbooking space.
Section 9: DIY Organization Projects
Step 1: Creating custom scrapbook supply organizers
Get creative and make your own custom scrapbook supply organizers using materials you already have. Repurpose old jars, cans, or boxes to create pen holders or storage containers. Use empty photo boxes or shoeboxes to create divided sections for storing smaller supplies like buttons or brads. Customizing your storage solutions allows you to maximize space and tailor them to your specific needs.
Step 2: Repurposing everyday items for storage
Look around your home and repurpose everyday items for scrapbook storage. Use an old muffin tin or ice cube tray to organize small embellishments. Hang a tension rod on the wall to display and store washi tape rolls. Repurpose a spice rack to hold ink pads or small stamps. The possibilities are endless when you think creatively about repurposing everyday items for scrapbook storage.
Step 3: Building a crafting table with built-in storage
If you have the space and skills, consider building a crafting table with built-in storage. This customized solution allows you to have a dedicated workspace with ample storage for all of your supplies. Include drawers, shelves, or cubbies in your design to keep your materials organized and easily accessible. A crafting table with built-in storage is a fantastic investment for any avid scrapbooker.
Section 10: Tips for Small Spaces
Step 1: Utilizing wall space for storage
In small scrapbooking spaces, every inch counts. Make use of your walls for additional storage. Install shelves, hooks, or hanging organizers to keep your supplies off the floor and within easy reach. Utilize vertical space to store bins or baskets for papers and supplies. By utilizing wall space for storage, you’ll free up valuable floor and tabletop space in your small scrapbooking area.
Step 2: Using portable storage solutions
If you have limited space or need to work in different areas of your home, portable storage solutions are a great option. Invest in rolling carts or trolleys with multiple shelves or drawers to store your supplies. These can easily be moved from room to room or tucked away when not in use. Portable storage solutions allow you to have an organized scrapbooking space no matter the size or location.
Step 3: Opting for multi-functional furniture
When working with limited space, opt for multi-functional furniture pieces to maximize your storage options. Look for desks or tables with built-in drawers or shelves. Consider storage ottomans or benches that also serve as seating while providing hidden storage space. By choosing furniture that serves multiple purposes, you’ll be able to utilize your space efficiently and keep your supplies organized.
Step 4: Taking advantage of vertical storage options
In small spaces, vertical storage is key. Make use of furniture with vertical storage options, such as bookcases or shelving units. Stackable storage containers or bins are also ideal for vertical organization. Hang pegboards or wall organizers to store tools and small supplies. By taking advantage of vertical storage options, you’ll utilize the height of your space and keep your scrapbooking supplies easily accessible.
With these comprehensive organization techniques and ideas, you can transform your scrapbooking space into a neat and efficient workspace. Remember to assess your supplies, choose the right storage solutions, and design a workflow that works best for you. Utilize creative displays, digital tools, and time-saving techniques to stay organized and maintain an enjoyable scrapbooking experience. With dedication and creativity, you’ll have an organized scrapbooking space that inspires you to create beautiful memories for years to come.

